Personal Blog of Badger This blog belongs to Badger. If you like this blog, you can subscribe to the blog, if you want to be notified about new entries in it. You can also view all your subscribed blogs. You can also view the list of all polls posted on this blog. Blog Votes This blog has received 13 upvotes and no downvotes. You need to log in first to vote on blogs. Flourless Chocolate Cake One of my neighbors distributes the See's Candy chocolate, and gave me a huge bag of their "overrun" chocolate. The last of the vat stuff, hardened into a brick like block. I was delighted!! After playing with homemade chocolate almond bark and peanut butter cups, it was time to bake this old family favorite!  Ingredients2 sticks (8 Tablespoons = 1 cup) of unsalted butter, cut into pieces (you can also use 1 cup of high quality margarine)8 large eggs 1 pound (16oz) of semisweet chocolate, coarsely chopped A pan of Boiling water InstructionsAdjust your oven rack to lower middle position and heat oven to 325 degrees (350 degrees for us high altitude folk). This is important so the top or bottom doesn't overcook. Line the bottom of an 8-inch springform pan with parchment paper and grease pan sides. While the original recipe calls for lining it with parchment paper, I was out of the paper, and just greased the pan REALLY well. Cover the bottom of the pan and along sides with a single sheet of foil and set in large roasting pan. You are doing this so you don't have any water seep in. This is actually important. However, since I was out of foil, I skipped this step and it turned out fine...but do be aware, this could be fatal to your cake.Boil a pan of water. In a mixer, beat the eggs until they double in volume. This takes about 5 minutes or so. In a double boiler, melt the chocolate and the butter together, stirring until completely blended. Not having a double boiler, I zapped the chocolate and butter 1 minute at a time in the microwave until it was melted instead. If you zap yours, be sure to stir with a wooden spoon to help it melt in between each minute. Fold 1/3 of the beaten egg foam into the melted chocolate/butter mixture until only a few streaks of egg are visible; fold in half of the remaining egg foam, mix again. Then the last of the remaining egg foam, until mixture is homogenous and totally blended together. Scrape the chocolate mixture into your prepared springform pan. Place the springform pan inside the roasting pan. Carefully pour enough boiling water in the roasting pan to come about halfway up the outside sides of the springform pan. Very carefully, so you don't get any water seepage in the springform pan. Bake at 325 degrees for about 25 minutes. The top will have a thin "crust" (like a brownie) that has formed on the surface. The cake will be very soft at this point, and you need be careful to not disturb it much. I let mine sit in the oven with the door open once the 25 minutes are reached for a few minutes to help it "set". Remove the springform pan from the water bath and set on a wire rack to cool. Once cooled to room temperature, cover and refrigerate overnight to mellow. You can also place it in the freezer at this point. This cake is best served very cold. About 30 minutes before you are ready to serve, remove the springform pan sides, invert the cake on a plate or a sheet of parchment paper. I used a plate because after that you are going to turn the cake back over on a serving platter or another cake. It was just easier. Eat plain (it's delectable!) or sprinkle the top with a little powdered sugar and add some seasonal berries. Bet you can't eat just one slice!!!! Written on 28 Jan 2015 at 8:51AM Comments Re: Flourless Chocolate Cake You would think the water wash would make a big difference, but truth be told, I couldn't tell any! Healthy is best!! So behave for a bit longer and I will try not to tempt you lol.
Posted at 24 Mar 2015 at 1:49PM by Badger Re: Flourless Chocolate Cake You're killing me! I'd love to try it but still am doing really well with my healthy eating. Now MAYBE if Sees chocolates were available here I would deviate... No, I wouldn't. I know I'll be making it but just not sure when. Does the water wash make it more creamy?
Posted at 24 Mar 2015 at 1:47PM by Shimshin Re: Flourless Chocolate Cake Let me know when you do. Been dieting myself lol....cake never helps! Ps...I made it again, but without the water bath, and you could hardly tell the difference!
Posted at 19 Mar 2015 at 5:29PM by Badger Re: Flourless Chocolate Cake I haven't tried it yet but as soon as I do, I'll let you know. I started a diet soon after I posted my response about this decadent and yummy looking cake so I can't make it yet. But, believe me, I will!
Posted at 18 Feb 2015 at 9:43PM by Shimshin Re: Flourless Chocolate Cake Have you tried it yet? I'm a little excited for you to taste how heavenly it is!
Posted at 17 Feb 2015 at 12:32PM by Badger Re: Flourless Chocolate Cake Thanks! Posted at 8 Feb 2015 at 6:26PM by Shimshin Re: Flourless Chocolate Cake Awesome! You are going to love this cake!!!!! Stay safe in the storm. Posted at 8 Feb 2015 at 12:31PM by Badger Re: Flourless Chocolate Cake haha, I already purchased the unsalted butter! We're expecting another snow storm so perhaps I'll make it if we're locked-in tomorrow. Hoping you're fine, Mary. It's been a long time since we've connected. Posted at 8 Feb 2015 at 12:26PM by Shimshin Re: Flourless Chocolate Cake I'd try it with the salted!
Posted at 8 Feb 2015 at 12:05PM by Badger Re: Flourless Chocolate Cake See's Chocolate? You're killing me!!! There's none better anywhere! This recipe sounds pretty easy to make and, yes, delicious. I've been cooking all day and am too tired to go out for unsalted butter. I have salted but you specified UNsalted so I can't make it now. Too bad. Grateful to you for sharing! Shimshin Posted at 28 Jan 2015 at 1:51PM by Shimshin You must be logged in to post comments. Only the owner can comment this blog. Lemony Cream Puffs Go ahead and hate me now, because once you have tried these simple to make cream puffs, you will be completely addicted! Ingredients1 cup water1/2 cup butter (1 stick) ...margarine will do in a pinch, but they are never quite as good without the real thing. 1 cup all-purpose flour 4 large eggs 1/2 teaspoon lemon juice (fresh is best, but concentrate will do) Confectioners sugar One of the three below: Cool Whip Your favorite pudding or home made whip cream as follows: 1 pint whipping cream Granulated sugar to taste Vanilla to taste Directions:Preheat oven to 400 degrees F, or for high altitude (above 4000ft), 425 degrees F. Set aside a large (10 or more) muffin tin, very lightly buttered. Bring water, lemon juice and butter to a slow boil over medium heat in heavy saucepan. Reduce heat to low and add flour, stirring until mixture forms a ball. Remove from heat. Stir in eggs, one at a time, beating until dough is smooth. Using a tablespoon, drop dough into deep muffin tins. This doesn't have to be an exact measurement, rather depends on how big you want your shells to be. Divide all the batter between 10 to 12 tins. I use heaping tablespoons for the largest size possible and if having company, will only divide into 8 of the tins. Bake shells in 400 degrees F oven for 25 to 35 minutes or until puffed (if high altitude, bake at 425 degrees F for 35 minutes), golden brown and dry. Important that the puffs are dry or they may collapse. If you pull them out too soon, and they fall, simply place back in the oven for another 5 minutes. Remove from oven and cool completely. When you think the shells are ready to take out of the oven, leave them in about another 2 minutes. They should be quite crisp on the outside for which you will be glad when you’re filling them later. Cover with foil when completely cooled, and chill in the fridge for an hour or more before serving.....if you can wait that long lol. Don't worry, they are still good if served warm, but are definitely better if chilled. When ready to eat, slice in half, scoop out the soft insides if desired (I rather enjoy the soft insides and leave it, but it is entirely a taste thing), and add a healthy dollop of pudding or whip cream. The low calorie version is just as good with Cool Whip, but note that frozen is better than thawed Cool Whip with these.If using homemade whip cream, whip your cream using electric beaters and add sugar and vanilla to your liking. 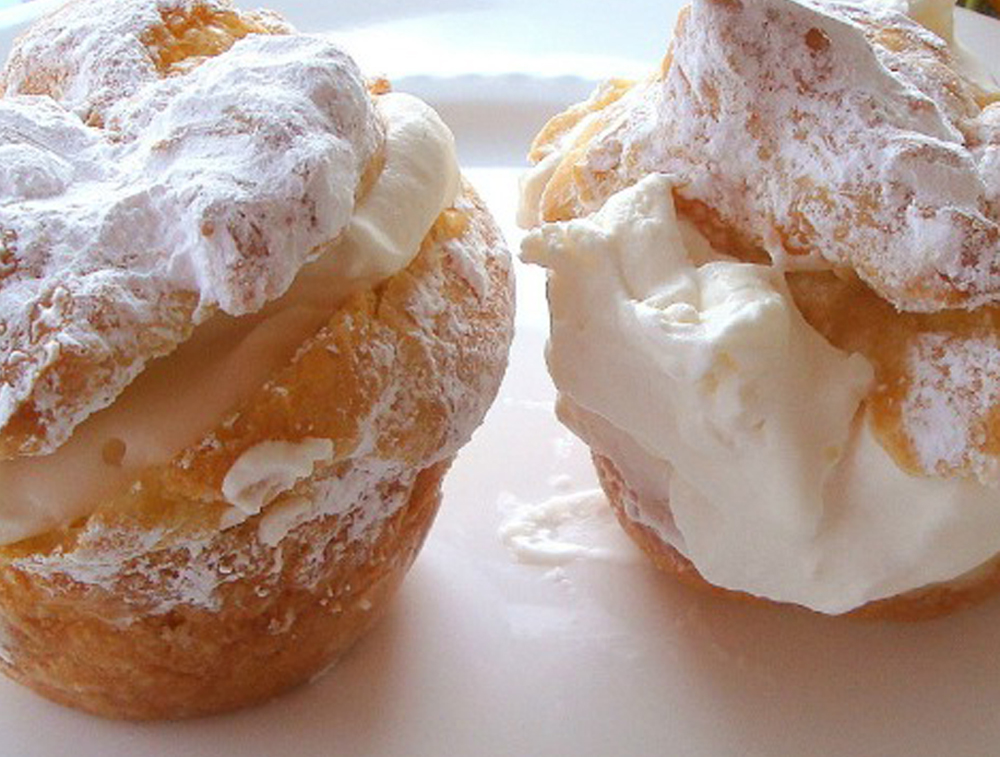 Written on 23 Jan 2014 at 2:39PM Comments Re: Lemony Cream Puffs Who's gonna make me some?
Posted at 11 Jan 2015 at 8:41AM by STUSTU Re: Lemony Cream Puffs V you too Jill Posted at 31 Dec 2014 at 1:15PM by Badger Re: Lemony Cream Puffs We Posted at 9 Dec 2014 at 5:00PM by Churchgoer Re: Lemony Cream Puffs Hello Mary! I just wanted to congrat. you on those delicious cream puffs! They're straight from heaven!!!! I also have a dandy! I take two of those good old windmill cookies and spray the inside of them with whipped cream! And to add to that sometimes I take a few of the the Lotus-Bischoff cookies with their own spread(straight from England} and once again I hit between two of them with Whipped cream. or peanut butter! Another great treat spoken from my Irish Terrier Big Boy! Sometimes he up and snatches my entire cookie! Do keep up those fine creations!! BOB
Posted at 25 May 2014 at 10:09PM by Bobbyb1947 Re: Lemony Cream Puffs Yes, that it would! Posted at 17 Apr 2014 at 1:50PM by Badger Re: Lemony Cream Puffs ooo.. almond... i LOVE the taste (and smell) of amaretto.. i have begun using almond extract in place of vanilla in many things.... i bet it would go wonderful with this (perhaps even the actual amaretto liquor lol)
Posted at 16 Apr 2014 at 1:20AM by pegasiswolf Re: Lemony Cream Puffs You can use any flavoring in place of lemon....vanilla works good!
Posted at 15 Apr 2014 at 1:53PM by Badger Re: Lemony Cream Puffs those look delicious! i cant have lemon tho... im allergic (lime is fine tho.. i bet this would work wonderful with lime )
Posted at 13 Apr 2014 at 11:20AM by pegasiswolf Re: Lemony Cream Puffs These aren't that bad, as long as you don't eat them all in one splurge (something I've done lol) and fill them with Cool Whip, plus, they are high protein. Posted at 23 Jan 2014 at 3:49PM by Badger Re: Lemony Cream Puffs There goes my diet!!!
Posted at 23 Jan 2014 at 3:21PM by Shimshin You must be logged in to post comments. Only the owner can comment this blog. 60 Gift mixes in-a-jar Recipes!  Chai Tea6 whole cloves1 8" cinnamon stick or 1/2 tsp. ground cinnamon 6 cardamom seeds 4 whole allspice or 1/4 tsp. ground allspice 1/2 tsp. ground ginger 4 whole black peppercorns 1 bay leaf 4 rounded tsp. loose Darjeeling tea (or other black tea) 6 cups water 2 cups milk 3 tbsp. honey Mix together all dry ingredients and store tightly sealed. To make a pot of Chai tea: Mix the Chai Tea mix in a medium saucepan with the 6 cups of water and bring to a boil. Allow the mixture to boil for 5 minutes. Add the 2 cups of milk and bring to a gentle simmer, do not boil. Allow the mixture to simmer until it reaches the desired strength, even over an hour. Add honey and stir to dissolve. Strain tea and serve immediately. Yield: 6 servings. Fruit & Spice TeaThis flavorful tea is good hot or cold. 1 jar orange breakfast drink (Tang), 15 oz size 1 cup granulated sugar 1-cup instant tea powder (unsweetened) 1/2-cup lemonade powder (sweetened) 1 packet unsweetened cherry Kool-Aid 2 tsp. cinnamon 1 tsp. nutmeg Mix together all ingredients well. Store tightly sealed. To serve, stir 2 tsp. to 2 Tbsp. (depending on size of cup and your taste) of tea mix into hot or cold water. Mulling Spices MixUse this to make mulled cider or wine. A small bag of mulling spices attached to a bottle of wine or jug of cider makes a nice holiday hostess gift. 3 boxes (1 ounce each) cinnamon sticks 6 whole nutmegs (1 ounce) 1/3 cup chopped dried orange peel 1/3 cup chopped dried lemon peel 1/4 cup whole allspice 1/4 cup whole cloves 2 tbsp. finely chopped, crystallized ginger Put cinnamon sticks and nutmegs in a heavy plastic bag and crush with a rolling pin, mallet, or a small heavy skillet until broken in small pieces. Mix with remaining ingredients. Store in an airtight container. Yield: enough spices for 14 batches of mulled wine or cider. Stir 1/2-cup water and 1/3 cup sugar in a 1 1/2 to 2-quart pan over medium heat until sugar dissolves. Add a 750-ml bottle of wine (3 1/4 cups). Place three generous tbsp. of mulling spices in a tea ball or muslin or cheesecloth bag and add to pan. Reduce heat to low, cover and heat very gently until mixture is very hot but not boiling, about 20 minutes. Discard spices. Place 3 generous tbsp. of mulling spices in a tea ball or muslin or cheesecloth bag. Add to a half-gallon (8 cups) apple cider in a 2 1/2 to 3-quart pan. Bring to a boil; reduce heat, cover, and simmer 30 to 35 minutes. Discard spices. Russian Tea1 cup instant tea mix (unsweetened and no lemon) 2 cups dry orange breakfast drink powder (Tang) 1 package unsweetened lemonade mix (to make 2 quarts) 1 cup sugar 1 tsp. ground cinnamon 1/2 tsp. ground cloves Mix together all ingredients well. Store tightly sealed. To serve, stir 2 tsp. to 2 tbsp. (depending on size of cup and your taste) of tea mix into hot water. Tropical Tea1 jar (15 oz.) instant orange breakfast drink mix 1 c. sugar 1 c. unsweetened instant tea powder 1/2 c. presweetened lemonade-flavored soft drink mix 1 tsp. EACH imitation pineapple extract and imitation coconut extract In a blender or food processor, combine all ingredients. Makes about 4 1/4 cups of tea mix. Give with serving suggestions. To serve: Stir a rounded tablespoonful of mix into 6 oz. of hot water. Beef Vegetable Barley Soup Mix3 cup pearl barley 3 tsp. dried whole basil 3 cup dried split peas 1 1/2 tsp. dried whole oregano 12 tbsp. beef bouillon granules 6 bay leaves 1 1/2 tsp. ground black pepper Mix the spices and separate into 6 portions. Add 2 Tbsp. of bouillon to each portion. Do the same with the beans and barley. Mix spices and beans and put into decorated jars or bags for gifts. Attach a gift tag to you jar, 1 package Beef Vegetable and Barley Soup Mix with these instructions: 2 tbsp. vegetable oil 1 pound beef stew meat -- 1-inch chunks 6 cups water 1 package Beef Vegetable and Barley Soup Mix 3 carrots -- chopped 3 celery stalks-- chopped 3- 4 potatoes = chopped In a large stockpot, heat the oil and add the meat cubes. Sauté until the meat is browned on all sides. Add the water, and Soup Mix. Bring to a boil, and reduce heat. Cover and simmer for 45 minutes. Stir in the celery, carrots and potatoes. Cover and simmer for 1 hour. Throw away the bay leaf. Confetti Bean Soup12 wide-mouth pint (2-cup) canning jars with lid and rings 14 pounds assorted dried peas, beans and lentils (at least 8 different varieties): pink beans black beans baby lima beans lentils red lentils black-eyed peas red kidney beans pinto beans split peas great northern beans small red beans white beans 12 Italian-flavor bouillon cubes (substitute beef-flavor if you cannot find Italianflavor cubes!) 12 bay leaves 1/2 yard print cotton fabric 1 round (6 yards) craft ribbon 2 pieces cardstock (for tags) Wash, rinse and dry canning jars. Layer beans in jars. Add 1/4-cup of each type of bean to the jars, layering the beans. Choose the most colorful bean for the bottom layers of the jar. Add eight 1/4-cup layers to each jar. Place 1 bay leaf and one bouillon cube on top of the beans in each jar. Seal each jar using lids and rings. Cut twelve 7-inch circles from cotton fabric. Top each jar with fabric circle, and tie with ribbon. Print two copies of gift tag with recipe instructions. Cut gift tags apart and attach to ribbon. Makes 12 gift jars. Include on gift tag: Set aside bouillon cube and bay leaf and choose method to soak beans. Quick soak: Rinse and sort beans in a large pot. Add 6-8 cups of hot water. Bring to a rapid boil, and boil for 2 minutes. Remove from heat. Cover and let stand for 1 hour. Drain soak water and rinse beans. Overnight soak: Rinse and sort beans in a large pot. Add 6-8 cups cold water. Let stand overnight, or at least 6 to 8 hours. Drain soak water and rinse beans. To cook: Place beans in a large pot. Add: 6 cups water 1 can (14 oz.) chopped tomatoes in juice 1 bay leaf bouillon cube Simmer gently until beans are tender, about 2 hours. Season to taste with salt and pepper. Hearty Bean Soup1/4 cup dried garbanzo beans 1/4 cup dried navy beans or lima beans 1/4 cup dried red kidney beans or pinto beans 1/4 cup dried whole or split peas 3 Tbsp. minced dried onion 2 Tbsp. whole wheat berries (optional) 2 Tbsp. pearl barley 2 Tbsp. dried celery flakes 2 tsp. instant beef bouillon granules 1/2 tsp. dried basil, crushed 1 bay leaf Dash Salt Combine all ingredients in a plastic bag or layer in an airtight container. Store, tightly sealed, until needed. Add the following recipes when giving the gift: Combine contents of package with 7 cups water in a 3-quart saucepan. Bring to boiling; reduce heat. Cover and simmer 2 minutes. Remove from heat, cover, and let stand 1 hour. (Or soak bean mixture in the water overnight in a covered pan.) Do not drain. Bring beans and liquid to boiling, reduce heat. Cover and simmer 1-1/2 to 2 hours or until beans are tender. Remove bay leaf. Season to taste. Makes 6-8 side dish servings. Follow basic recipe through the soaking step. Add 1 3/4-1 pound smoked pork hock or beef shank crosscuts. Bring to boiling; reduce heat. Cover and simmer 1 hour for pork hocks or 1-1/2 hour for beef shanks. Remove meat, chop coarsely and return to soup. Remove bay leaf. Add 1 16-oz. Can tomatoes, cut up and undrained. Add one medium carrot, chopped. Cover and simmer for 30 more minutes. Season to taste. Makes 4-6 servings. Follow basic recipe but reduce water to 5-1/2 cups. Remove bay leaf. Brown 1/2 pound ground beef and drain off fat. Add 1-tsp. chili powder and cook 1 minute. Add to bean soup along with 1 10-oz. can Rotel. Heat trough, stirring occasionally. Season to taste. Serve in tortilla bowls or with corn chips. Garnish with jalapenos, if desired. Makes 6-8 main-dish servings. Follow basic recipe through the soaking step, except reduce water to 4 cups. Remove bay leaf. Mash beans slightly. Add 2 cups milk and 1 6-oz. link cheese food or smoked cheese food. Cook and stir until beans are soft. Makes 4-6 main dish servings. Meat & Potatoes Casserole in a Jar3 cups dehydrated Potatoes 1/3 cup Nonfat Dry Milk 1 pkg. (6 Tbsp.) Sauce Mix 1/4 tsp. Black Pepper 1/2 tsp. Salt 1 tsp. Beef Bouillon Granules Place above ingredients into a quart jar, placing milk, sauce mix, pepper, salt & bouillon granules into a small zip baggie, which will be placed on top of potatoes in the jar. Place lid on jar & store in a cool dry place until ready to use. Attach the following instructions for later use, or for gift giving: Brown 1 pound of ground beef in a skillet, and drain off excess fat. Stir in 2 3/4 cups water and the ingredients from the jar. Heat to boiling, reduce heat, cover and simmer stirring now and then, for about 25 minutes or until the potatoes are tender. Yield: 4 one-cup servings Onion Soup Mix3 onion bouillon cubes, crushed 1 beef bouillon cube, crushed 2 tsp. cornstarch 1/3-cup instant onion flakes 2 dashes pepper Put all ingredients in a mason jar and store in cool, dry place. To use: Empty into a pot and gradually stir in 4 cups cold water and 1 Tbsp. butter. Bring to boil, reduce heat and cover. Simmer 20 minutes. Ladle soup into ovenproof bowls, sprinkle with croutons or toasted bread. Then add one slice provolone cheese. Briefly put bowls under a broiler to melt cheese. Serve. Makes 4 1-cup servings. Mix one package onion soup mix with 2 cups sour cream. Chill before serving. Palouse Soup Mix2-1/2 c. green split peas (16-oz. pkg.) 2-1/2 c. lentils (16 oz. pkg.) 2-1/2 c. pearl barley (16-oz. pkg.) 2 c. alphabet macaroni (8 oz. pkg.)--I use brown rice instead 1 c. dried onion flakes (2 3/8-oz. pkgs.) 1/2-c. celery flakes (1 3/8-oz. pkg.) 1/2-c. parsley flakes (1 1/4-oz. pkg.) 1-1/2 t. thyme 1-1/2 t. white pepper Mix all ingredients together. Store in a jar with a tight- fitting lid. Stir before using. Makes 10 c. of mix. Combine 1 c. of soup mix with 4 c. of water or seasoned stock in large pan. Add 1 c. of cooked chopped meat, if desired. Bring to a boil. Reduce heat to low and cover pan. Simmer gently for 45 to 60 minutes, or until peas are tender. Add 1/2-tsp. salt if desired. Combine 1 c. of soup mix with a 16-oz. can of stewed tomatoes, 2 to 3 c. water or stock, 1 chopped carrot, 1 to 2 chopped potatoes, and 1/2 t. basil. (Optional: 1 clove minced garlic). Bring to a boil. Reduce heat to low and cover pan. Simmer 45 to 60 minutes or until peas are tender. Add 1/2-tsp. salt, if desired. Pasta Shell Soup1/2 cup small shell macaroni or other small pasta1/4 cup dry lentils 1/4 cup dried chopped mushrooms (optional) 2 Tbsp. grated Parmesan cheese 1 Tbsp. minced dried onion 1 Tbsp. instant chicken bouillon granules 1 tsp. dried parsley flakes 1/2 tsp. dried oregano, crushed Dash garlic powder Mix all ingredients in a plastic bag or layer in an airtight container. Store, tightly sealed, until needed. Give with the following recipe: Combine contents of package with 3 cups water in a 2-quart saucepan. Bring to boiling; reduce heat. Cover and simmer 40 minutes, or until lentils are tender, stirring occasionally. Makes 3 side dish servings. Scalloped Potatoes in a Jar3 cups dehydrated Potatoes1 package (6 Tbsp.) Sauce Mix 1/3 cup Nonfat Dry Milk Place these ingredients into a one quart jar, making certain the sauce mix and dry milk are first placed into small zip baggies, then sealed with the air removed. Place the potatoes into the bottom of the jar, then add the baggie of mix on top. Place lid on jar and store in a cool dry place until ready to use. Attach the following instructions for later use, or for gift giving: 3 Tbsp. Butter or Margarine 2-3/4 cups boiling Water Pour the potatoes into a medium size ungreased casserole and sprinkle the sauce mix on top. Dot with butter; stir in the boiling water. Bake at 400 degrees F for 30 to 35 minutes or until tender. If you are cooking something else at a lower temperature in your oven, adjust the baking time; at 350 degrees bake 40 to 45 minutes; at 325 degrees bake 50 to 55 minutes. Split Pea Soup in a Jar2-1/2 cups green split peas (16-oz. pkg.) 2-1/2 cups lentils (16 oz. pkg.) 2-1/2 cups pearl barley (16-oz. pkg.) 2 cups alphabet macaroni (8 oz. pkg.) 1 cup dried onion flakes 1/2-cup celery flakes 1/2-cup parsley flakes 1-1/2 tsp. thyme 1-1/2 tsp. white pepper Mix all ingredients together. Store in a jar with a tight-fitting lid. Stir before using. Makes 10 cups of mix. Combine 1 cup of soup mix with 4 cups of water or seasoned stock in large pan. Add 1 cup of cooked chopped meat, if desired. Bring to a boil. Reduce heat to low and cover pan. Simmer gently for 45 to 60 minutes, or until peas are tender. Add 1/2 tsp. of salt if desired. Beef Gravy Mix1 1/3 cups instant nonfat milk powder 3/4 cup instant flour 3 tbsp. instant beef bouillon granules 1/8 tsp. ground thyme 1/4 tsp. onion powder 1/8 tsp. ground sage 1/2 cup butter or margarine 3 tsp. brown sauce for gravy Combine milk powder, instant flour, bouillon granules, thyme, onion powder and sage. Stir with a wire whisk to blend. Cut in butter or margarine until evenly distributed. Drizzle brown sauce for gravy over mixture. Stir with wire whisk until blended. Spoon into a 3-cup container with a tight-fitting lid. Label with date and contents; store in the refrigerator. Use with 4-6 weeks. Curried Rice Mix1 cup long-grain rice 1 chicken bouillon cube, crumbled 2 Tbsp. dried minced onion 1/4 cup raisins 1/2 tsp. curry powder Layer the ingredients in the order given in a 1 & 1/2-cup jar. Attach this to the Jar: 2 1/2 cups water 1 package Curried Rice Mix In a medium saucepan bring the water to a boil. Add the rice mix. Cover and reduce the heat to a simmer for 20 minutes. Homemade Chicken Gravy1 1/3 cups instant nonfat dry milk powder 3/4 cup instant flour 3 tbsp. instant chicken bouillon granules 1/4 tsp. ground sage 1/8 tsp. ground thyme 1/8 tsp. ground pepper 1/2 cup butter or margarine Combine milk powder, instant flour, bouillon granules, thyme, sage and pepper. Stir with a wire whisk to blend. Cut in butter or margarine until evenly distributed. Spoon into a 3-cup container with a tight-fitting lid. Label with date and contents; store in the refrigerator. Use with 4-6 weeks Sloppy Joe Mix1 tbsp. instant minced onion 1-tsp. green pepper flakes 1 tsp. salt 1 tsp. cornstarch 1/2 tsp. instant minced garlic 1/4 tsp. dry mustard 1/4 tsp. celery seed 1/4 tsp. chili powder Combine all ingredients in a small bowl until well blended. Spoon mixture onto a 6-inch square of aluminum foil and fold to make airtight. Label as Sloppy Joe Seasoning Mix. Store in a cool, dry place and use within 6 months. Makes 1 package (about 3 tbsp.) of mix. Brown 1 pound lean ground beef in a medium skillet over medium-high heat. Drain excess grease. Add seasoning mix, 1/2 cup water, 1 (8 oz) can of tomato sauce and bring to a boil. Reduce heat and simmer 10 minutes, stirring occasionally. Serve on hamburger buns. Taco Seasoning2 tsp. instant minced onion 1 tsp. salt 1 tsp. chili powder 1/2 tsp. cornstarch 1/2 tsp. crushed dried red pepper 1/2 tsp. instant minced garlic 1/4 tsp. dried oregano 1/2 tsp. ground cumin Combine all ingredients in a small bowl and blend well. Spoon mixture onto a 6-inch square of aluminum foil and fold to make airtight. Label as Taco Seasoning Mix. Store in a cool, dry place and use within 6 months. Makes 1 package (about 2 tbsp.) of mix. Using the above recipe as a guide you can increase the amounts to make any number of packages. Brown 1 pound lean ground beef in a medium skillet over medium-high heat; drain the excess grease. Add 1/2-cup water and the seasoning mix. Reduce heat and simmer 10 minutes, stirring occasionally. Yield: filling for 8 to 10 tacos. Enchilada Sauce Mix1 tsp. salt 1 tsp. chili powder 1/2 tsp. sugar 1/2 tsp. ground cumin 1/4 tsp. oregano 2 tsp. minced onion 1 tsp. dried chili pepper 1 tsp. corn meal 1/2 tsp. minced garlic 1 tsp. paprika Mix together with a little water and a squeeze of lime juice, and use amount you desire when making enchiladas. French Dressing1/4 c Sugar 1 tsp. Dry Mustard 1/8 tsp. Onion Powder 1 1/2 tsp. Paprika 1 1/2 tsp. Salt Combine all ingredients in a small bowl; stir until well blended. Put mixture in a foil packet or 1-pint glass jar and label as: Store in a cool, dry place and use within 6 months. Makes enough mix (5 Tbsp.) for 1 1/4 cups of French Dressing. Sweet Italian Dressing: Increase sugar to 1/2 cup. Substitute 1 Tbsp. celery seed for paprika. French Dressing: Combine 1 pkt. of mix, 3/4 cup vegetable oil, and 1/4 cup vinegar in a glass jar. Shake until well blended. Chill before serving. Makes about 1 1/4 cups of French Dressing. Italian Dressing1 tsp. dried minced onion 1 tbsp. dried parsley leaves, crushed 1/4 tsp. ground oregano 1/2 tsp. dried sweet basil leaves, crushed 1/4 tsp. ground thyme or marjoram 1/2 tsp. celery seed 1/4 tsp. garlic powder 2 tbsp. grated Parmesan cheese 1 1/2 tsp. granulated sugar 1/8 tsp. salt pinch of pepper Combine all ingredients in a small bowl, stirring until evenly distributed. Wrap airtight in heavy-duty aluminum foil and label. Store in a cool, dry place. Use within six months. Yield: 1 package (4 tbsp.) To make many packages of this at once, place a square of foil for each package on the table. Measure out the ingredients, one at a time onto each square of foil (first measure the dried onion onto each piece of foil, then the parsley, etc.) Wrap each tightly and label. 1 package (4 tbsp.) Italian Dressing Mix 1/3 cup red wine vinegar 3/4 cup vegetable oil Put all ingredients into a bowl, cruet, or pint jar and stir or shake until well blended. Cover and refrigerate 30 minutes before serving. Yield: about 1 cup of dressing Buttermilk Pancake Mix2 cups buttermilk powder 8 cups all-purpose flour 1/2 cup granulated sugar 8 tsp. baking powder 4 tsp. baking soda 2 tsp. salt Sift the ingredients together well. Store in a container with a tight-fitting lid. Use within 6 months. Yield: 10 cups of mix. Write this on your gift tags: 1 egg, beaten 2 tbsp. vegetable oil 1-cup water, or more as needed. 1 1/2 cups Buttermilk Pancake Mix In a medium bowl, combine egg, oil, and 1-cup water. With a wire whisk, stir in Pancake Mix until blended. Let stand 5 minutes. Stir in additional water for a thinner batter. Lightly oil and preheat griddle. Pour about 1/3-cup batter onto hot griddle for each pancake. Cook until edge is dry and bubbles form. Turn with a wide spatula. Cook 35 to 45 seconds longer until browned on both sides. Repeat with remaining batter. Yield: about 10 four-inch pancakes. Carrot Raisin Bread In a Jar2- 2/3 cups White Sugar 2/3 cup Vegetable Shortening 4 Eggs 2/3 cup Water 2 cups shredded Carrots 3 1/2 cups all-purpose Flour 1/4 tsp. Cloves 1 tsp. Cinnamon 1 tsp. Baking Powder 2 tsp. Baking Soda 1 tsp. Salt 1 cup Raisins You will need 6 wide-mouth pint-size canning jars, metal rings and lids. Don't use any other size jars. Sterilize jars, lids and rings according to manufacturer's directions. Grease inside, but not the rim of jars. Cream sugar and shortening, beat in eggs and water, add carrots. Sift together flour, cloves, cinnamon, baking powder, baking soda and salt; add to batter. Add raisins and mix. Pour one cup of batter into prepared jars. Do not use more than one cup or batter will overflow and jar will not seal. Place jars evenly spaced on a cookie sheet. Place in a pre-heated 325-degree oven for 45 minutes. While cakes are baking, bring a saucepan of water to a boil and carefully add jar lids. Remove pan from heat and keep hot until ready to use. Remove jars from oven one at a time keeping remaining jars in oven. Make sure jar rims are clean. (If they're not, jars will not seal correctly) Place lids on jars and screw rings on tightly. Jars will seal as they cool. Cakes will slide right out when ready to serve. Cinnamon Pancake Mix3 cups all-purpose flour 3 Tbsp. sugar 2 Tbsp. baking powder 4-1/2 tsp. ground cinnamon 1-1/4 tsp. salt In brown bag or 1 quart jar, combine all ingredients; seal bag or jar, adding dried fruits (apples are especially good!) if necessary to fill small gaps. In medium bowl, combine 3/4-c. milk, 1 egg, and 2-T. salad oil. With fork, blend in 1-1/3 c. pancake mix until moistened but still lumpy. Cook on lightly greased griddle or skillet. Makes about 10 5" pancakes. Flaky Pie Crust Mix12 1/2 cups all-purpose flour 2 tbsp. salt 5 cups vegetable shortening Combine flour and salt in a large bowl and blend well. With a pastry blender, cut in shortening until evenly distributed. Mixture will resemble cornmeal in texture. Put in a large airtight container and label as: Flaky PieCrust Mix Store in a cool, dry place and use within 10 to 12 weeks. Or put about 2 1/2 cups of mixture each into 6 freezer bags. Seal and label bags and freeze. Use within 12 months. Yield: about 16 cups mix, enough for 6 double piecrusts or 12 single piecrusts. 2 1/2 cups Flaky Pie Crust Mix 1/4 cup ice water 1 large egg, Beaten 1 tbsp. white vinegar Crumble Flaky PieCrust Mix, if frozen. Put mix in a medium bowl. In a small bowl, combine ice water, egg and vinegar. Sprinkle one spoonful of the water mixture at a time over the flaky piecrust mix and toss with a fork until dough barely clings together in the bowl. Roll out dough to desired thickness between 2 sheets of lightly floured wax paper. Place dough in 9-inch pie plate without stretching. Flute edges. If filling recipe calls for a baked piecrust, preheat oven to 425 degrees F. (220 degrees C.). Bake 10 to 15 minutes, until very lightly browned. Cool. Fill and bake according to directions for filling. For double crust pie, place top crust over filling, press and flute edges, and cut slits in top crust. Makes enough crust for one 9-inch double-crust pie or two single-crust pies. Granola3 cups reg. rolled oats 1 cup shredded coconut 1 cup of any mixture of the following: shelled sunflower seeds, sesame seeds, or chopped pecans, filberts, peanuts, or cashews 3/4 cup regular wheat germ 3/4 cup chopped or sliced almonds 2/3 cup brown sugar, firmly packed 1/2 cup instant nonfat dry milk 1/3 cup honey 1/4 cup vegetable oil 1 1/2 cups of any one or mix of the following: chopped dates, raisins, currants, chopped dried apricots, or chopped dried peaches Preheat oven to 325 degrees F. Grease a large 16 x 11 x 2 inch baking pan with solid shortening and set aside. Combine the first 7 ingredients in a bowl, mixing well. In a small saucepan, combine honey and oil; heat gently to dissolve honey. Pour honey mixture into the dry ingredients, stirring well to thoroughly coat and mix. Spread the mixture evenly over the baking pan and bake for 15-20 minutes or until toasted to your liking. While baking, stir with a spatula every 5 minutes. As granola cools, add the chopped dried fruit. Cool well and store at room temperature in quart sized mason jars tied with raffia bows! Instant Oatmeal (3 Kinds!)3 cups quick oats Salt 6 plastic sandwich bags Put 1/2-cup oats in blender and blend at high speed until powdery. Reserve in a small bowl, then process another 1/2-cup oats. Into each bag, put 1/4 cup unchopped oats, 2 tbsp. powdered oats, and a scant 1/4-tsp. salt. Seal and store pkts. in an airtight container. To serve: empty packet in bowl and add 3/4 cups boiling water. Stir and let stand 2 minutes. 3 Variations:
Moist Pie Crust Mix5 lb. (20 cups) all-purpose flour 2 tbsp. salt 3 lb. can vegetable shortening 3 cups cold water 1/4 cup all-purpose flour, if desired Combine flour and salt in a very large bowl. Mix well. With pastry blender cut in shortening until evenly distributed. Mixture will resemble cornmeal in texture. Add cold water all at once and mix lightly until the flour absorbs all the water and texture resembles putty. If dough is too sticky, sprinkle a little flour over the top and mix until dough barely holds together in the bowl. Divide dough into 10 oblong rolls. Wrap each roll well with plastic wrap and heavy foil. Freeze and label as Moist PieCrust Mix. Use within 12 months. Yield: 10 rolls of mix; enough for 10 double piecrusts or 20 single piecrusts. Partially thaw 1 roll of mix. Divide dough into 2 balls. Roll out dough to desired thickness between 2 sheets of lightly floured wax paper. Place dough in a 9-inch pie plate without stretching. Flute edges. If filling recipe calls for a baked piecrust, preheat oven to 425 degrees F. (220 degrees C.) Bake 10 to 15 minutes until very lightly browned. Cool. Fill and bake according to directions for filling. For double crust pie, place top crust over filling and flute edges, and cut slits in the top crust. Makes enough for one 9-inch double crust pie or 2 9-inch single crust pies. Pizza Crust Mix2 3/4 cups bread flour 1 package (1 Tbsp.) active dry yeast 2 tsp. salt In a medium bowl, combine all the ingredients. Place the mix in an airtight container. Attach this to the Jar: Makes 2 12-inch pizzas 1 package Pizza Dough Mix 2 Tbsp. olive oil 1 cup warm water 1 cup tomato sauce 1/2 cup grated mozzarella cheese 1/3 cup freshly grated Parmesan 1 tsp. crushed oregano Place the Pizza Dough Mix in a large bowl & add the oil and water. Beat with a wooden spoon or dough hook until mixture forms a ball. Turn out onto a floured board and knead for 5 minutes. Transfer to a greased bowl and let the dough rise for 90 minutes. Divide the dough in half and pat into two 12-inch circles. For thin crust, fill and bake the pizzas now. For thicker crust, let pizzas rise 30 to 45 minutes. Top the pizza dough with tomato sauce, cheeses of your choice, crushed oregano, and olive oil drizzled over the pizzas. Preheat the oven and bake at 425 degrees F for 20 to 25 minutes. Let stand 5 minutes. Applesauce Cookie Mix1 cup brown sugar 2 1/4 cups all-purpose flour 1/2 tsp. baking soda 1/2 tsp. salt 3/4 tsp. ground cinnamon 3/4 cup raisins 3/4 cup chopped nuts Combine flour, salt, cinnamon and baking soda - stir well. Place flour mixture in a clean mason jar. Pack down tight so everything will fit in the jar. (Use a spoon or a mallet.) Add other ingredients, one item at a time, packing each layer down. Put the lid on the jar and tie a ribbon around the lid. You can add a personalized label, if you wish. As an added touch, tie a wooden spoon to the lid with a piece of ribbon. Print out the following instructions on a gift card and tape the card to the jar: Whip 3/4 cup of butter or shortening until light and fluffy. Add 1 egg and 1/2 cup applesauce and beat until mixed. Stir in the ingredients from this jar until well combined. Drop tsp. of dough on a greased cookie sheet. Bake for 8 - 12 minutes at 350 degrees F. Share with a friend. Candy Cookies in a jar1/2 cup sugar 1/2 cup brown sugar, firmly packed 1 tsp. powdered vanilla 1 tsp. baking soda 2 cups flour Combine all ingredients in a medium bowl. Whisk the ingredients together until they are evenly distributed, making sure all brown sugar lumps are crushed. Store in an airtight container. Attach this to the Jar: Makes 3 dozen cookies 1 cup unsalted butter or margarine, softened 1 large egg 1 package Candy Cookie Mix 1 cup candy bar chunks (Reese's peanut butter cups, Butterfinger bars, white or milk chocolate chunks) Preheat oven to 350 degrees F. In the large bowl of an electric mixer, beat the butter until it is smooth. Add the egg, and continue beating until the egg is combined. Add the Candy Cookie Mix and candy bar chunks and blend on low just until the cookie mix is incorporated. Form the cookies into 1 1/2-inch balls & place them 2 inches apart on an ungreased cookie sheet. Bake for 10 to 12 minutes, until golden on the edges. Remove from oven, and cool on cookie sheet for 2 minutes. Caramel Nut Cake in a Jar2 cups brown sugar 2/3 cup sugar 1 cup (2 sticks) butter 4 eggs 2/3 cup milk 1 Tbsp. vanilla 3 1/2 cups flour 1 tsp. baking powder 2 tsp. baking soda 1 tsp. salt 1 cup chopped nuts In large bowl cream sugars and butter with electric mixer. Add eggs and mix well. Add milk and vanilla and mix well. Place dry ingredients and spices in a separate large bowl and blend with a whisk. Add creamed ingredients to dry ingredients and mix with whisk and spoon. Gently stir in nuts. Place 1-cup batter each into 6 well-greased 1-pint wide-mouth canning jars. Wipe batter from rim. Place jars on a baking sheet. Bake at 325 degrees F for 50 minutes, or until a toothpick inserted in center comes out clean. Wipe rims. Place hot sterilized seals and rings on hot jars. Keep in refrigerator for prolonged storage. Carrot Cake Mix2 cups sugar 2 tsp. powdered vanilla 1/2 cup chopped pecans 3 cups all-purpose flour 2 tsp. baking soda 1 Tbsp. cinnamon 1/4 tsp. nutmeg Combine and blend ingredients in a small bowl. Store in an airtight container. Attach this to the jar: Makes 1 13x9-inch cake 1 package Carrot Cake Mix 1 1/2 cups vegetable oil 3 large eggs 3 cups grated carrots 1 (8-ounce) can crushed pineapple Preheat oven to 350 degrees F & grease 13x9-inch pan. Place Carrot Cake Mix in large mixing bowl. Make a well in the center of the mix & add the oil, eggs, carrots & pineapple. Blend until smooth. Pour into the prepared pan & bake for 40 to 50 minutes, or until a toothpick inserted into center comes out clean. Cool the cake and frost if desired or dust with powdered sugar. Chocolate Cake in a Jar1 stick plus 3 Tbsp. Butter or Margarine 3 cups White Sugar 4 Eggs 1 tbsp. Vanilla 2 cups Applesauce, unsweetened 3 cups White Flour 3/4 cup unsweetened Cocoa powder 1 tsp. Baking Soda 1/2 tsp. Baking Powder 1/8 tsp. Salt Pre-wash 8 pint-sized wide mouth canning jars (be sure to use the kind that have no shoulders) in hot, soapy water. Rinse well, dry and let them come to room temperature. Grease insides of jar well. Beat together butter and half of sugar until fluffy. Add eggs and remaining sugar, vanilla and applesauce. Sift dry ingredients together and add to the applesauce mixture a little at a time: beat well after each addition. Pour one cup of batter into each jar and carefully remove any batter from the rims. Place jars in a preheated 325-degree oven and bake for 40 minutes. While cakes are baking, bring a saucepan of water to a boil and carefully add jar lids. Remove pan from heat and keep lids hot until ready to use. When the cakes have finished baking, remove jars from oven. Make sure jar rims are clean. (If they're not, jars will not seal correctly) Place lids on jars, and screw rings on tightly. Jars will seal as they cool. Cakes will slide right out when ready to serve. Unsealed jars should be stored in the refrigerator and eaten within 2 weeks. Sealed jars may be stored with other canned food or placed in a freezer. The cake is safe to eat as long as the jar remains vacuum-sealed and free from mold. If you are concerned about the safety of storing your cakes, an alternative is to store them in the freezer. Chocolate Covered Raisin Cookie Mix3/4 cup white sugar 1/2 cup packed brown sugar 1-cup chocolate covered raisins 1/2-cup milk chocolate chips 1 3/4 cups flour 1 tsp. baking powder 1/2 tsp. baking soda Mix together the flour, baking powder and baking soda. Layer ingredients in order given in a quart size wide mouth-canning jar. Press each layer firmly in place making sure you really pack it. Attach instructions to the jar: Empty cookie mix into large mixing bowl. Use your hands to thoroughly blend mix. Add 1/2-cup butter, softened at room temperature. DO NOT USE MARGARINE Add 1 egg, slightly beaten and 1 tsp. vanilla. Mix until completely blended. You will need to finish mixing with your hands. Shape into walnut sized balls. Place 2 inches apart on a parchment lined cookie sheet. DO NOT USE WAXED PAPER. Bake at 375 degrees F 13 to 15 minutes until tops are very lightly browned. Cool 5 minutes on baking sheet. Remove cookies to racks to finish cooling. Makes 2 1/2 dozen Cocoa Peanut Butter Cookie Mix1 cup packed brown sugar 1 1/2 cups packed confectioners' sugar 3/4 cup cocoa 1 1/2 cups all-purpose flour 1 tsp. baking powder 1/4 tsp. salt In a separate bowl, mix together the flour, baking powder and salt. Layer ingredients in order given in a 1-quart ''wide mouth'' canning jar. Clean the inside of the jar with a dry paper towel after adding the confectioners' sugar and after adding the cocoa powder. Be sure to pack everything down firmly before adding the flour mixture, it will be a tight fit. Instructions to attach to Jar: Empty jar of cookie mix into large mixing bowl. Use your hands to thoroughly blend mix. Add: 1/2-cup butter, softened at room temperature. DO NOT USE MARGARINE. Add 1/2-cup creamy peanut butter, 1 egg, slightly beaten, and 1 tsp. of vanilla. Mix until completely blended. You will need to use your hands to finish mixing. Shape into walnut sized balls and place 2 inches apart on a parchment lined baking sheets. DO NOT USE WAXED PAPER. Press balls down with a fork. Bake at 350 degrees F for 9 to 11 minutes until edges are browned. Cool 5 minutes on baking sheet then transfer to a cooling rack to finish cooling. Makes 3 dozen cookies. Coconut Cream Pudding Mix3 cups nonfat dry milk 4 cups sugar 1 tsp. salt 3 cups cornstarch 1 1/2 cups shredded unsweetened coconut 1 tsp. coconut extract Mix the extract and the shredded coconut in a small bowl until the extract is absorbed. Add the coconut to the other ingredients and store in airtight container. To prepare, add 2/3-cup mix to 2 cups milk. Heat and stir constantly while boiling. Cool, then serve. Coffee Mug Cakes (5 Kinds!)1 cake mix any flavor 1 (4 serving size) instant pudding mix (not sugar free), any flavor Place dry cake mix and dry pudding mix into a large bowl and blend well with a whisk. This will be about 4 - 4 ½ cups dry mix and will make 8-9 coffee cup cake mixes. Place ½ cup dry mix into a sandwich bag. Place mix into a corner of the bag and tie it there with a twist tie. Continue making packets until all your dry mix is used. Flavor suggestions: *Lemon cake mix- lemon pudding *Yellow cake mix- vanilla pudding *Devils food cake mix- chocolate pudding *Pineapple cake mix- coconut pudding *Butterscotch cake mix- butterscotch pudding Select a large coffee cup. Check it to be sure it holds 1 ½ cups of water. That way you will be sure you have bought the size the recipe calls for. It can't have any metallic paint on it because it will be used in the microwave. Decorating the cups: Paint on the cup if you like. DecoArt Ultra Gloss Acrylic Enamel is one brand of craft paint that can be made dishwasher safe by baking the painted cup in the oven. (instructions are on the bottle of paint usually). Glaze mix 1/3 cup powdered sugar 1 ½ tsp. dry flavoring (such as powdered lemonade mix, powdered orange breakfast drink mix, cocoa powder) Vanilla powder sold by coffee flavorings (or use French Vanilla CoffeeMate) Select the flavoring appropriate to the cake you are making; Example: For the pineapple coconut cake include flaked coconut in a separate bag with instructions to sprinkle it over the frosted cake. Place the glaze mix ingredients into a sandwich bag and tie into corner of bag. Label this bag "glaze mix" and attach it to the other bag with a twist tie. Place one baggie cake mix and one baggie glaze mix in each coffee cup. Now attach the following baking instructions to each coffee cup: Generously spray inside of coffee cup with cooking spray. Empty contents of large packet into cup. Add 1 egg white, 1 tbsp. oil, 1 tbsp. water to dry mix. Mix 15 seconds, carefully mixing in all the dry mix. Microwave on full power 2 minutes.( you may not get satisfactory results in a low wattage small microwave). While cake is cooking, place ingredients from "Glaze Mix" into a very small container and add 1 ½ tsp. water. Mix well. When cake is done, pour glaze over cake in cup. Enjoy while warm. Cornflake Cookie Mix1 1/4 cups white sugar 1/4 tsp. salt 2 1/2 cups coconut 1 1/2 cups corn flake cereal Place sugar and salt in a clean mason jar. Pack down tight so everything will fit in the jar. (Use a spoon or a mallet.) Add other ingredients, one item at a time, packing each layer down (put cornflakes in last and don't crunch them down!). Put the lid on the jar and tie a ribbon around the lid. You can add a personalized label, if you wish. As an added touch, tie a wooden spoon to the lid with a piece of ribbon. Print out the following instructions on a gift card and tape the card to the jar: Whip 3 egg whites until stiff. Add 1/2 tsp. of vanilla extract. Stir in the ingredients from this jar until well combined. Drop tsp. of dough on an ungreased cookie sheet. Bake for 15 minutes at 325 degrees F. Share with a friend. Cowboy Cookies1 1/3 cups quick cooking oats 1/2 cup packed brown sugar 1/2 cup white sugar 1/2 cup chopped pecans 1-cup semisweet chocolate chips 1 1/3 cups all-purpose flour 1 tsp. baking powder 1 tsp. baking soda 1/4 tsp. salt Layer the ingredients in a 1-quart jar in the order given. Press each layer firmly in place before adding the next one. Include a card with the following instructions: Preheat oven to 350 degrees F. Grease cookie sheets. In a medium bowl, cream together 1/2 cup of butter or margarine, 1 egg, and 1 tsp. of vanilla. Stir in the entire contents of the jar. You may need to use your hands to finish mixing. Shape into walnut sized balls. Place 2 inches apart on the prepared cookie sheets. Bake for 11 to 13 minutes in the preheated oven. Remove from cookie sheets to cool on wire racks. Cranberry HootyCreeks1/2 cup plus 2 tbsp. flour 1/2 cup rolled oats 1/2 cup flour mixed with 1/2 tsp. baking soda and 1/2 tsp. salt 1/3 cup plus 1 tbsp. packed brown sugar 1/3 cup white sugar 1/2 cup dried cranberries 1/2 cup pecans Layer the ingredients in a quart jar in order as listed. Attach recipe below, to jar: In a medium bowl, cream together: 1/2-cup butter (softened), 1 egg, and 1-tsp. vanilla. Add the entire jar of ingredients and mix together by hand until well blended. Drop by heaping spoonfuls onto greased baking sheet. Bake at 350* for 8-10 min. Crazy Cake in a Jar2 cups flour2/3 cup Cocoa Powder 3/4 tsp. Salt 1 1/2 tsp. Baking Powder 1 1/3 cups Sugar In a large bowl, combine flour, salt, cocoa powder & baking powder. Layer ingredients in jar in order given in a 1 quart canning jar. It is helpful to tap jar lightly on a padded surface (towel on counter) as you layer the ingredients to make all ingredients fit neatly. Use scissors to cut a 9 inch-diameter circle from fabric of your choice. Center fabric circle over lid and secure with a rubber band. Tie on a raffia or ribbon bow to cover the rubber band. Attach a card with the following directions: 3/4 cup Vegetable Oil 2 tsp. Vinegar 1 tsp. Vanilla 2 cups Water Stir cake ingredients together using a wire whisk or fork, making certain that all ingredients are completely mixed together. Bake at 350 degrees F for 35 minutes. Frost as desired or serve sprinkled with powdered sugar, with fresh fruit on the side. Dreamsicle Cookie Mix1/2 cup orange-flavored drink mix (e.g. Tang) 3/4 cup white sugar 1 1/2 cups vanilla baking chips 1 3/4 cups all-purpose flour 1/2 tsp. baking soda 1/2 tsp. baking powder Combine the flour with the baking soda and baking powder. Starting with the Tang, then sugar, vanilla chips and ending with the flour mixture. Layer the ingredients in a clean glass wide mouth quart sized jar. Press each layer firmly in place before adding the next ingredient. Attach a recipe card with the following instructions to the jar: Yield 2 1/2 dozen Preheat oven to 375 degrees F (190 degrees C). Empty contents into a large mixing bowl. Add 1/2 cup softened butter, 1 egg slightly beaten and tsp. vanilla extract. Mix until completely blended. Roll heaping tablespoonfuls into balls. Place 2 inches apart on a lightly greased baking sheet. Bake at 375 degrees F for 12 to 14 minutes or until tops are very lightly browned. Cool for 5 minutes on the sheet then remove cookies to wire racks to cool completely. Hawaiian cookie Mix1/3 cup sugar 1/2 cup packed brown sugar 1/3 cup packed flaked coconut 2/3 cup chopped macadamia nuts 2/3 cup chopped dates 2 cups flour mixed with 1-tsp. baking soda and 1 tsp. baking powder Layer ingredients in jar in order given. Press each layer firmly in place before adding next ingredient. Recipe to attach to jar: Empty cookie mix in large mixing bowl; stir to combine. Add 1/2 cup softened butter, 1 egg slightly beaten and 1-tsp. vanilla; mix until completely blended. Roll dough into walnut-sized balls. Place 2 inches apart on a lightly greased cookie sheet. Press cookie down slightly with the heel of your hand. Bake at 350º for 11 to 13 minutes or until edges are lightly browned. Cool 5 minutes on baking sheet. Remove to wire racks to cool completely. Yield: 2-1/2 dozen. M&M Oatmeal Bars Mix1/2 cup old-fashioned oats 1/2 cup mini M&M's candies 1/2 cup packed light brown sugar (see cook's note) 1-cup biscuit & baking mix 1/2 cup packed dark brown sugar 1-cup biscuit & baking mix In 1-quart wide-mouth glass jar, gently layer and pack ingredients in the order listed, beginning with oats. If there is any space left after adding the last ingredient, add more candies to fill the jar. Place lid on top. Cut an 8-inch circle of fabric to cover lid. Place fabric over lid; secure in place with ribbon or raffia. Decorate as desired. Cook's note: After measuring the brown sugar, crumble it between your fingers for uniform texture. Be sure to pack the brown sugar firmly in the jar to prevent the baking mix from sifting down through it. Make a gift card to attach as follows: Empty contents of jar into medium bowl. Stir in 1/2-cup (1 stick) butter, melted; 1 large egg; and 1-tsp. vanilla. Press into an 8 x 8 x 2-inch baking pan coated with cooking spray. Bake at 350 degrees for 18 to 22 minutes or until bars are light golden brown and center is almost set. Makes 16 bars. Oatmeal Raisin Cookie Mix1/2 cup sugar 1/2 cup packed brown sugar 1 cup flour 1 tsp. baking powder 1/4 tsp. salt 1 1/4 cup raisins 1 1/4 cup oats Combine flour, salt and baking soda - stir well. Place flour mixture in a clean mason jar. Pack down tight so everything will fit in the jar. (Use a spoon or a mallet.) Add other ingredients, one item at a time, packing each layer down. Put the lid on the jar and tie a ribbon around the lid. As an added touch, tie a wooden spoon to the lid with a piece of ribbon. Print out the following instructions on a gift card and tape the card to the jar: Whip 1/2 cup of butter until light and fluffy. Add 1 egg and 1-tsp. vanilla and beat until mixed. Stir in the ingredients from this jar until well combined. Drop 1 Tbsp. of dough on a greased cookie sheet. Bake for 15 minutes at 350 degrees F. Share with a friend. Oatmeal ScotchiesFor 1 jar: 3/4 cup packed brown sugar 1/2 cup white sugar 3/4-cup butterscotch baking chips 2 cups rolled oats 1 cup all-purpose flour 1 tsp. ground cinnamon 1/2 tsp. ground nutmeg 1 tsp. baking soda 1/2 tsp. salt For 12 jars: 9 cups brown sugar 6 cups white sugar 9 cups (5 12-ounce packages) butterscotch baking chips 24 cups rolled oats 12 cups all-purpose flour 12 tsp. cinnamon 6 tsp. nutmeg 12 tsp. baking soda 6 tsp. salt 1/2 yard print cotton fabric 1 round (6 yards) craft ribbon 2 pieces cardstock (for tags) In large bowl, combine flour, cinnamon, nutmeg, baking soda and salt. Layer ingredients in order given in canning jars, layering flour mixture last. Cut twelve 7-inch circles from cotton fabric. Top each jar with fabric circle, and tie with ribbon. Print two copies of gift tag with recipe instructions. Cut gift tags apart and attach to ribbon. Makes 12 gift jars. Include on gift tag: Empty mix into large mixing bowl, mix thoroughly. Add 3/4-cup butter, softened, 1 beaten egg, and 1-tsp. vanilla. Mix until completely blended. Form 1-inch balls and place 2 inches apart on ungreased cookie sheet. Bake at 350 degrees until edges are lightly browned, about 10-12 minutes. Cool 5 minutes on cookie sheet, then transfer to wire rack to cool completely. Makes 3 dozen cookies. Orange Slice Cookie Mix3/4 cup sugar 1/2 cup packed brown sugar 1 3/4 cups flour mixed with 1-tsp. baking powder and 1/2 tsp. baking soda 1 1/2 cups orange slice candies, quartered (wrap in plastic wrap) Layer ingredients in jar in order given. Press each layer firmly in place before adding next ingredient. Recipe to attach to jar: Remove candies from jar and set aside. Empty cookie mix in large mixing bowl; stir to combine. Add 1/2 cup softened butter, 1 egg slightly beaten and 1-tsp. vanilla; mix until completely blended. Stir in orange candies. Roll dough into walnut-sized balls. Place 2 inches apart on a lightly greased cookie sheet. Bake at 375º for 12 to 14 minutes or until edges are lightly browned. Cool 5 minutes on baking sheet. Remove to wire racks to cool completely. Yield: 2-1/2 dozen. Pina Colada Cake in a Jar1 Can Pineapple -- (20 oz) crushed 1 Cup Margarine -- at room temperature 3 1/2 Cups Brown sugar -- packed 4 Eggs -- whipped 1/2 Cup Rum 3 1/3 Cups Unbleached flour 1 1/2 Tsp. Baking powder 1 Tsp. Baking soda 1 Cup Coconut -- shredded Preheat oven at 325. Before starting batter, wash 8 (1 pint) wide mouth canning jars with lids in hot soapy water and let drain, dry, and cool to room temperature. Generously prepare jars with cooking spray and flour. Drain pineapple for 10 minutes, reserving juice. Puree drained pineapple in a blender. Measure out 1 1/2 cups puree, adding a little juice if necessary to make 1 1/2 cups. Set puree aside. Discard remaining juice. In a mixing bowl, combine applesauce, half brown sugar until light and fluffy. Beat in eggs and pineapple puree. Set aside. In another mixing bowl, combine flour, baking powder, and baking soda. Gradually, add to pineapple mixture in thirds, beating well with each addition. Stir in coconut. Spoon 1 level cupful of batter into each jar. Carefully wipe rims clean, then place jars on baking sheet (or they'll tip over) in the center of oven. Bake 40 minutes. Keep lids in hot water until they're used. When cakes are done, remove jars which are HOT from oven one at a time. If rims need cleaning, use moistened paper towel. Carefully put lids and rings in place, then screw tops on tightly shut. Place jars on a wire rack; they will seal as they cool. Once jars are cool, decorate with round pieces of cloth and then glue on flowers, ribbons, etc. on lid, ring and side of jar. Unscrew the ring (the lid should be sealed by now) and place a few cotton balls on top of the lid (makes it poofy on top), then a piece of cloth (about 3" larger than the lid) on top and screw the ring back on. Decorate as desired. Pumpkin Cake in a Jar2/3 cup shortening 2 2/3 cups sugar 4 eggs 2 cups canned pumpkin 2/3 cup water 3 1/3 cups flour 1/2 tsp. baking powder 1 1/2 tsp. salt 1 tsp. ground cloves 1/2 tsp. ground allspice 1 tsp. ground cinnamon 2 tsp. baking soda 1 cup chopped walnuts 8 pint-size wide mouth canning jars with lids and rings Preheat oven to 325 degrees. Cream shortening and sugar together, adding sugar slowly. Beat in eggs, pumpkin, and water; set aside. In another bowl, stir together flour, baking powder, salt, cloves, allspice, cinnamon, and baking soda. Add to pumpkin mixture and stir well. Stir in nuts. Grease jars well and fill each jar about half full. Place jars on baking sheet and bake for approximately 45 minutes. When done, remove jars, and wipe the sealing edge of the jars. Place lids on jars and close tightly with the ring. Reese's Peanut Butter Cup Cookie Mix3/4 cup sugar 1/4 cup packed brown sugar 1-3/4 cups flour mixed with 1-tsp. baking powder and 1/2 tsp. baking soda 8 large Reese's peanut butter cups candies cut into 1/2- inch pieces (wrap in plastic wrap) Layer ingredients in jar in order given. Press each layer firmly in place before adding next ingredient. Recipe to attach to jar: Remove candies from jar and set aside. Empty cookie mix in large mixing bowl; stir to combine. Add 1/2 cup softened butter, 1 egg slightly beaten and 1-tsp. vanilla; mix until completely blended. Stir in candies. Roll dough into walnut-sized balls. Place 2 inches apart on a lightly greased cookie sheet. Bake at 375º for 12 to 14 minute or until edges are lightly browned. Cool 5 minutes on baking sheet. Remove to wire racks to cool completely. Yield: 2-1/2 dozen. Sandart BrowniesFor 1 jar: 2/3 tsp. salt 1 1/8 c. flour, divided 1/3 c. cocoa powder 2/3 c. brown sugar 2/3 c. sugar 1/2-c. chocolate chips 1/2 c. white chocolate chips 1/2 c. walnuts or pecans For 12 jars: 8 tsp. salt 13 1/2 c. flour, divided 4 c. cocoa powder 8 c. brown sugar 8 c. sugar 6 c. chocolate chips (3 -12-ounce packages) 6 c. white chocolate chips (3 -12-ounce packages) 6 c. walnuts or pecans 1/2 yard print cotton fabric 1 round (6 yards) craft ribbon 2 pieces cardstock (for tags) Wash, rinse and dry canning jars. Layer ingredients as follows: 2/3 t. salt 5/8 c. flour 1/3 c. cocoa powder 1/2 c. flour 2/3 c. brown sugar 2/3 c. sugar 1/2 c. chocolate chips 1/2 c. white chocolate chips 1/2 c. walnuts Close jars with lids and rings. Cut twelve 7-inch circles from cotton fabric. Top each jar with fabric circle, and tie with ribbon. Print two copies of gift tag with recipe instructions. Cut gift tags apart and attach to ribbon. Makes 12 gift jars. Recipe for gift tag: Preheat oven to 350 degrees. Grease one 9x9 baking pan. Pour the contents of the jar into a large bowl and mix well. Stir in 1-tsp. vanilla, 2/3-cup vegetable oil and 3 eggs. Beat until just combined. Pour the batter into the prepared pan and bake at 350 degrees for 20 to 25 minutes. Sugar Cookies in a jar3 1/4 cups all-purpose flour 1 1/4 cups white sugar 1/4 cup colored decorating sugar 2 1/2 tsp. baking powder 1/2 tsp. salt Combine flour, salt and baking powder - stir well. Place flour mixture in a clean mason jar. Pack down tight so everything will fit in the jar. (Use a spoon or a mallet.) Stir sugar and colored sugar together, add to the jar. Put the lid on the jar and tie a ribbon around the lid. As an added touch, tie a wooden spoon to the lid with a piece of ribbon. Print out the following instructions on a gift card and tape the card to the jar: Whip 2/3 cup of butter or shortening until light and fluffy. Add 2 eggs, 2 Tbsp. milk and 1 tsp. vanilla and beat until mixed. Stir in the ingredients from this jar until well combined. Roll into small balls and place on a greased cookie sheet. Flatten each ball slightly with a fork or the bottom of a glass. Bake for 8 minutes at 350 degrees F. Share with a friend. Trail Mix Cookie Mix1/2 Cup Packed Brown Sugar 1/2 Cup White Sugar 3/4 Cup Wheat Germ 1/3 Cup Quick Cooking Oats 1 Cup Raisins 1/3 Cup Packed Flaked Coconut 1/2 Cup all-purpose Flour 1 Tsp. Baking Powder Layer ingredients in order given in a quart ''Wide Mouth'' canning jar. Mix the flour together with the baking powder. Press each layer firmly in place, It will be a tight fit. Attach directions to jar: Empty Jar Of Cookie Mix Into Large Mixing Bowl. Use Your Hands to Thoroughly Blend Mix. Add: 1/2-Cup Butter, Softened At Room Temperature. Do Not Use Margarine. Mix In 1 Egg, Slightly Beaten and 1 Tsp. Vanilla. Mix until Completely Blended. You Will Need To Finish Mixing With Your Hands. Shape Into Walnut Sized Balls And Place 2 Inches Apart On A Sprayed Cookie Sheet. Bake At 350 Degrees F for 12 To 14 Minutes Until Edges Are Lightly Browned. Cool 5 Minutes On Baking Sheet. Remove Cookies to Racks To Finish Cooling. Makes 2 1/2 Dozen Cookies. Triple Chocolate Chip Cookies1/2 cup chopped pecans 1/2-cup chocolate chips 1/2 cup white chocolate chips 1/3-cup brown sugar packed 3/8 cup white sugar 1/2 tsp. soda 1/4 tsp. salt 1/6 cup coca 1 1/4 cups all purpose flour Place in this order in a 1-quart jar. Attach this on a recipe card: To make cookies, add: 1/2 tsp. vanilla 1 tbsp. milk 1 egg 1 stick melted butter Place 1-inch balls on cookie sheer and press a little flat. Cook at 350 degrees for 8 minutes. Vanilla Pudding Mix3 cups nonfat dry milk 4 cups sugar 1/2 tsp. nutmeg 1 tsp. salt 3 cups cornstarch 1/2 tsp. vanilla extract Mix all except the vanilla, and store in an airtight container. Add to gift tag: To prepare, mix 1/2 cup of mix to 2 cups milk. Heat and stir constantly while boiling. Cool, then add 1/2-tsp. vanilla extract. White Chocolate Macadamia Nut Cookie MixFor 1 jar: 1 1/4 cups white sugar 1/2 cup chopped macadamia nuts 1 cup white chocolate baking chips 2 cups all-purpose flour 1/2 tsp. baking soda 1/2 tsp. baking powder For 12 jars: 15 cups white sugar 6 cups chopped macadamia nuts 12 cups (6 -12-ounce packages) white chocolate chips 24 cups all-purpose flour 6 tsp. baking soda 6 tsp. baking powder 1/2 yard print cotton fabric 1 round (6 yards) craft ribbon 2 pieces cardstock (for tags) Mix flour, baking soda, baking powder. Layer ingredients in quart-size canning jars, flour mixture last. Cut twelve 7-inch circles from cotton fabric. Top each jar with fabric circle, and tie with ribbon. Print two copies of gift tag with recipe instructions. Cut gift tags apart and attach to ribbon. Makes 12 gift jars. Include on gift tag: Empty cookie mix into mixing bowl; use hands to thoroughly blend mix. Add: 1/2-cup butter, softened, 1 beaten egg, and 1 tsp. of vanilla. Mix until completely blended. Shape into 1-inch balls and place 2 inches apart on greased cookie sheets. Bake at 375 degrees for 12 to 14 minutes until tops are very lightly browned. Cool 5 minutes on baking sheet. Remove to racks to finish cooling. Makes 2 1/2 dozen cookies. White FruitCake in a JarFRUITS: 1 Cup canned pineapple -- chunks 2/3 Cup chopped citron 2/3 Cup shredded lemon -- peel 1/2 Cup chopped candied -- cherries 3/4 Cup chopped dates 1 Cup chopped dried -- apricots 2/3 Cup shredded orange -- peel 1/2 Cup chopped figs 1 Cup white raisins 1/2 Cup shredded coconut 2 Cups chopped walnuts 1/2 Cup flour CAKE: 1 Cup sugar 1 Cup shortening 5 eggs 1 Cup flour 1 Tsp. salt 1 Tsp. baking powder 1/4 Cup pineapple juice 2 Quarts water to put in -- the pressure cooker Drain pineapple, saving juice. Dredge fruits and nuts with 1/2-c. flour. Cream shortening and sugar and add eggs, one at a time, beating mixture well after each addition. Sift flour, salt and baking powder and add alternately to the mixture with the pineapple juice. Pour batter into canning jars that have been greased and floured. BE SURE TO USE WIDE MOUTH JARS. Allow steam to flow from vent pipe of pressure cooker for 20 min. Pressurize for 30 min. at 10-lbs. pressure for pints and 60 min. for qts. When placing jars in cooker, cover LOOSELY with lids, wax paper or foil. Allow space in the jars for some expansion. Tighten lids after jars have been removed from the pressure cooker. Zucchini Bread in a Jar2 cups sugar 1 cup oil 3 eggs 2/3 cup water 1 tsp. vanilla 3 1/4 cups flour 1 tsp. baking powder 1 tsp. baking soda 1/2 tsp. salt 1 1/2 Tbsp. cinnamon 3 cups grated zucchini 1 cup chopped nuts In large bowl cream sugar and oil with electric mixer. Add eggs and mix well. Add water and vanilla and mix well. Place dry ingredients in a separate large bowl and blend with a whisk. Add creamed ingredients to dry ingredients and mix with whisk and spoon. Place 1-cup batter each into 6 well-greased 1-pint wide-mouth canning jars. Wipe batter from rim. Place jars on a baking sheet. Bake at 325 degrees F for 55 to 60 minutes, or until a toothpick inserted in center comes out clean. Wipe rims. Place hot sterilized seals and rings on hot jars. Keep in refrigerator for prolonged storage. Written on 25 Oct 2013 at 5:18PM No comments have been posted yet. (You must be logged in to post comments) (Only the owner can comment this blog) Salt Free Spice Recipes  You can make your own spice mixes for a third of the cost, and be healthier for it! Here's a list of easy to make recipes: Basic Seasoning1 teaspoon each dried basil, marjoram, parsley flakes, thyme and savory (finely crush all) 1 tablespoon garlic powder 1 teaspoon onion powder 1 teaspoon rubbed sage 1 teaspoon ground mace 1 teaspoon pepper 1/8 teaspoon cayenne pepper Taco Seasoning4 Tbsp. chili powder 1 tsp. granulated garlic or garlic powder 1 tsp. granulated onion or onion powder 1 tsp. crushed red pepper flakes or cayenne pepper 2 tsp. dried oregano 2 tsp. paprika 2 Tbsp. ground cumin 4 tsp. black pepper Blackened Seasoning1 1/2 tablespoons paprika 1 tablespoon garlic powder 1 tablespoon onion powder 1 tablespoon ground thyme 1 teaspoon ground black pepper 1 teaspoon cayenne pepper 1 teaspoon dried basil 1 teaspoon dried oregano Santa Fe Seasoning4 teaspoons ground cumin 2 1/2 teaspoons ground coriander 2 1/2 teaspoons chili powder 2 teaspoons dried oregano 2 teaspoons dried thyme 1/4 teaspoon clove 1/4 teaspoon allspice 1/4 teaspoon cinnamon Creole Seasoning3 tablespoons paprika 2 tablespoons garlic powder 2 tablespoons onion powder 1 tablespoon dried basil 1 tablespoon dried oregano 1 tablespoon cayenne pepper 1 tablespoon fresh ground black pepper 1 tablespoon white pepper 1 1/2 teaspoons dried thyme 1 teaspoon dry mustard Fajita Mix1 tablespoon cornstarch 2 teaspoons chili powder 1 teaspoon paprika 1 teaspoon sugar 3/4 teaspoon crushed chicken bouillon cube 1/2 teaspoon onion powder 1/4 teaspoon garlic powder 1/4 teaspoon cayenne pepper 1/4 teaspoon cumin Cajun Rub8 tablespoons paprika 3 tablespoons cayenne 5 tablespoons black pepper, freshly ground 6 tablespoons garlic powder 3 tablespoons onion powder 2 1/2 tablespoons dried oregano 2 1/2 tablespoons dried thyme Jamaican Rub1 1/2 teaspoons ground allspice 1 1/2 teaspoons dried thyme 1 teaspoon curry powder 1 1/2 teaspoons paprika 1 teaspoon sugar 3/4 teaspoon black pepper 1 1/2 teaspoons cayenne pepper 1/4 teaspoon grated nutmeg 1/4 teaspoon ground cinnamon 1/8 teaspoon ground cloves Salad Seasoning1 1/2 teaspoons sesame seeds 1 teaspoon paprika 1/2 teaspoon poppy seed 1/2 teaspoon celery seed 1/4 teaspoon garlic powder 1/4 teaspoon coarse ground black pepper 1 dash cayenne pepper Italian Seasoning1 teaspoon thyme 1 teaspoon oregano 1 teaspoon savory 1 teaspoon marjoram 1 teaspoon basil 1 teaspoon sage 1 teaspoon rosemary Old Bar Seasoning1 tablespoon bay leaf powder 2 1/2 teaspoons celery seed, ground fine 1 1/2 teaspoons dry mustard 1 1/2 teaspoons black pepper 3/4 teaspoon ground nutmeg 1/2 teaspoon ground cloves 1/2 teaspoon ground ginger 1/2 teaspoon paprika 1/2 teaspoon ground red pepper flakes 1/4 teaspoon mace 1/4 teaspoon cardamom Rib Rub2 tablespoons granulated sugar 1 tablespoon packed brown sugar 1 1/2 teaspoons garlic powder 1 1/2 teaspoons chili powder 1 1/2 teaspoons paprika 1 1/2 teaspoons ground cumin 1 teaspoon onion powder 1 teaspoon white pepper 1 teaspoon ground black pepper Arabic 7 Spice2 tablespoons ground black pepper 2 tablespoons paprika 2 tablespoons ground cumin 1 tablespoon ground coriander 1 tablespoon ground cloves 1 teaspoon ground nutmeg 1 teaspoon ground cinnamon 1/2 teaspoon ground cardamom Pork Roast Rub6 tablespoons brown sugar 6 tablespoons chili powder 3 tablespoons paprika 2 1/2 tablespoons black pepper 2 1/2 tablespoons garlic powder 3 teaspoons dried tarragon 1 tablespoon onion powder 1 tablespoon lemon pepper 1 tablespoon rosemary 1 tablespoon dried thyme 1 tablespoon mustard powder 1 teaspoon cumin 1/2 teaspoon cayenne (or adjust to heat level) Poultry seasoning & stuffing1 tablespoon rosemary 1 tablespoon oregano 1 teaspoon sage 1 tablespoon ginger 1 tablespoon marjoram 1 tablespoon thyme 1 teaspoon pepper Curry Powder(grind all to a fine powder) 4 1/2 teaspoons ground coriander 2 teaspoons turmeric 1 1/2 teaspoons cumin seeds 1/2 teaspoon whole black peppercorn (1/2 to 1) 1/2 teaspoon crushed red pepper flakes (1/2 to 1) 1/2 teaspoon cardamom, whole,without pods 1/2 inch cinnamon stick 1/4 teaspoon whole cloves 1/4 teaspoon ground ginger Mrs Dash Mix1/2 teaspoon cayenne pepper 1 tablespoon garlic powder 1 teaspoon basil 1 teaspoon marjoram 1 teaspoon thyme 1 teaspoon parsley 1 teaspoon savory 1 teaspoon mace 1 teaspoon onion powder 1 teaspoon sage 1 teaspoon black pepper Greek Seasoning2 teaspoons oregano 1 1/2 teaspoons onion powder 2 teaspoons garlic powder 2 teaspoons black pepper 1 teaspoon dried parsley 1 teaspoon cornstarch 1/2 teaspoon dried thyme Beef Stew Mix2 cups flour 4 teaspoons oregano 2 tablespoons basil 4 1/4 tablespoons black pepper 4 1/4 tablespoons garlic powder 4 1/4 tablespoons paprika 1 teaspoon cayenne pepper 2 tablespoons celery seeds 4 1/4 tablespoons onion powder 2 teaspoons rosemary Steak Mix2 teaspoons paprika 1 teaspoon black pepper, find grind 1 teaspoon msg, Accent 1/2 teaspoon cayenne pepper 1/2 teaspoon garlic powder 1/2 teaspoon onion powder 1/4 teaspoon coriander 1/4 teaspoon turmeric Pumpkin Spice4 teaspoons cinnamon 2 teaspoons ginger 1 teaspoon allspice 1 teaspoon nutmeg Saltless Lawry's2 tablespoons superfine sugar 1 tablespoon cornstarch 3 tablespoons celery seed (Grind) 2 tablespoons paprika 1 tablespoon onion powder 2 teaspoons garlic powder 2 teaspoons ground turmeric 1/4 teaspoon cayenne pepper 1/4 teaspoon ground cloves 1/4 teaspoon ground cumin 1/4 teaspoon ground oregano 1/4 teaspoon ground thyme 1/8 teaspoon ground cinnamon Rice Mix3/4 cup chicken salt free bouillon granule (you can also use chicken stock when cooking the rice instead) 1/2 cup dried parsley 1 tablespoon basil 1 tablespoon dill weed 2 tablespoons dried onion flakes 1 teaspoon basic seasoning mix from above 2 teaspoons garlic powder 1 teaspoon lemon pepper seasoning 1 cup almonds, coarsely chopped (optional) Chili Mix1 tablespoon white flour, unbleached 1 1/2 teaspoons chili powder 1/2 teaspoon red pepper flakes, crushed 1/2 teaspoon sugar 2 tablespoons dried onion 1 teaspoon basic seasoning mix from above 1/2 teaspoon dried garlic 1/2 teaspoon ground cumin Grill Seasoning3 tablespoons fresh coarse ground black pepper 1 tablespoon basic seasoning mix from above 1 tablespoon onion powder 1 tablespoon garlic powder 1 tablespoon ground coriander 1 teaspoon crushed red pepper flakes Five Spice Powder(finely grind all) 3 tablespoons cinnamon 6 star anise or 2 teaspoons anise seeds 1 1/2 teaspoons fennel seeds 1 1/2 teaspoons szechuan peppercorns or 1 1/2 teaspoons whole black peppercorns 3/4 teaspoon ground cloves Gyro Mix2 tablespoons chili powder 1 tablespoon ground coriander 1 tablespoon ground cumin 1/2 tablespoon paprika, hot or sweet 1/2 tablespoon garlic powder 1 tablespoon dried parsley 2 teaspoons dried oregano 2 teaspoons dried thyme 1 teaspoon ground cinnamon KFC Mix4 tablespoons nonfat dry milk powder 8 1/2 tablespoons Basic Spice mix from above 2 tablespoons egg white powder 3/8 teaspoon garlic powder 8 tablespoons ground pepper (6 tbsps Tellicherry, 2 tbsps white) 4 tablespoons ground sage 2 1/2 tablespoons ground ginger 1 tablespoon ground winter savory 1 tablespoon ground vanilla bean 2 1/4 teaspoons ground anise seeds 1 1/2 teaspoons ground cardamom 1 1/2 teaspoons ground cloves 1 1/2 teaspoons onion powder 1 1/2 teaspoons smoked paprika 1 1/2 teaspoons ground rosemary Seasoned Flour2 cups flour 2 tablespoons Basic Spice mix from above 1 tablespoon ground celery seed 1 tablespoon pepper 2 tablespoons dry mustard 4 tablespoons paprika 2 tablespoons garlic powder 1 teaspoon ginger 1/2 teaspoon thyme 1/2 teaspoon sweet basil 1/2 teaspoon oregano Chipolte Mix1/3 cup chili powder 2 tablespoons dried cilantro 2 tablespoons cumin 2 tablespoons Mexican oregano, leaves 2 tablespoons dried sweet basil leaves 1 tablespoon garlic powder 1 tablespoon dried thyme leaves 1 tablespoon crushed chipotle pepper Directions for all of the above: Mix together all ingredients and store in an air-tight container.Written on 31 Jul 2013 at 2:17PM Comments Re: Salt Free Spice Recipes THEY ALL SOUND GREAT WHAT'S WITH THE TREE RAT RUNNING ACROSS THE TOP OF THE PAGE? Posted at 2 Sep 2013 at 11:38AM by Doodles Re: Salt Free Spice Recipes Walmart sure doesn't always have the best price or the freshest spice lol.
Posted at 7 Aug 2013 at 9:48AM by Badger Re: Salt Free Spice Recipes Thanks Mary. The Walmart I shop at has 1.75 oz McCormick cardamon for over $12.00. Yours must sell a different brand. I'll look at other places to see if cheaper brands are available or go online like you. Jim 
Posted at 7 Aug 2013 at 9:00AM by fatdaddy Re: Salt Free Spice Recipes You sure can Nana, though you will need to crush up quit a few top get a 3/4 cup. Better Than Bouillon (my favorite for taste and because it comes salt free), Wylars and Herb-ox all make awesome bouillon granule that will save you time & money, and are commonly stocked in grocery stores too. Posted at 7 Aug 2013 at 8:07AM by Badger Re: Salt Free Spice Recipes I can hardly wait to try these. Can i crush chicken bouillon cubes for the granule in the rice mix?
Posted at 6 Aug 2013 at 8:29PM by Cat*Scratch Re: Salt Free Spice Recipes Wow! Thank you for the amazing array of rubs! Dinners that I prepare will now be more exciting and delicious! What a great lady you are to share this with all of us! 
Posted at 1 Aug 2013 at 4:23AM by Shimshin Re: Salt Free Spice Recipes Great herb combinations! That cardamon is expensive though. Almost as expensive as saffron.
Posted at 31 Jul 2013 at 7:31PM by fatdaddy You must be logged in to post comments. Only the owner can comment this blog. Hot Tamales ________ 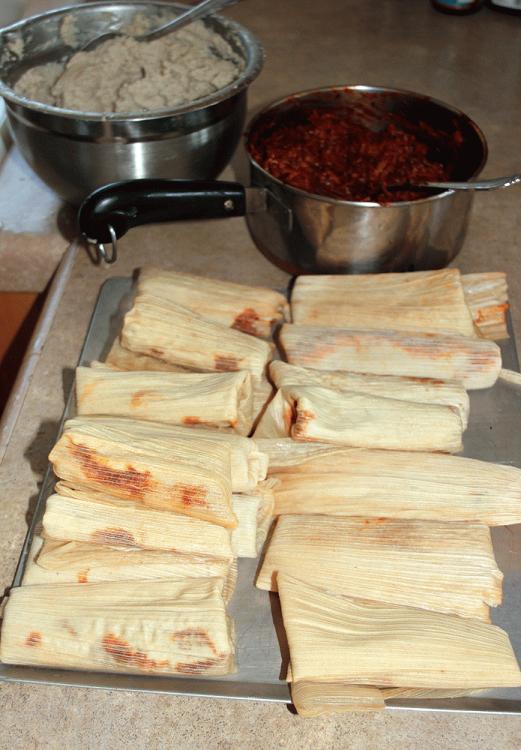 Easy Hot Tamales3 1/2 lbs pork shoulder or 3 1/2 lbs pork butt, trimmed of fat and cut up10 cups water 1 medium onion, quartered 3 garlic cloves, minced 3 1/2 teaspoons salt Red Chili Sauce recipe below 3/4 cup shortening 6 cups masa harina 1 1/2 teaspoons baking powder 50 dried corn husks (about 8 inches long) Directions: Be sure to cut as much fat off the pork shoulder as reasonably possible and cut into large 2 inch wedges to cook. In a 5 qt pot, bring pork, water, onion, garlic and 1 1/2 salt to boil. Simmer covered, about 2 1/2 hours or until meat is very tender. Remove meat from broth and allow both meat and broth to cool. Shred the meat using 2 forks, discarding only excessive fat - not all as a little fat adds flavor to your tamales. Emulsify the broth in blender when cooled enough. In a large sauce pan, heat the red chili sauce (see Red Chili Sauce recipe below) and add meat; simmer, covered for 10 minutes. To make masa, beat shortening on medium speed in a large bowl for 1 minute. In a separate bowl, stir together masa harina (usually found in the Mexican food isle), baking powder and 2 teaspoons salt. Alternately add masa harina mixture and broth to shortening, beating well after each addition. (Add just enough broth to make a thick, creamy paste - around 6 to 7 cups of broth). In the mean time, soak corn husks in very warm water for at least 20 minutes; rinse to remove any corn silk and drain well just before use. Don't drain too soon, or they will harden again. To assemble each tamale, spread 2 tablespoons of the masa mixture on the center of the corn husk (each husk should be 8 inches long and 6 inches wide at the top. If husks are small, overlap 2 small ones to form one. If it is large, tear a strip from the side). Place about 1 tablespoon meat and sauce mixture in the middle of the masa. Fold in sides of husk and fold up the bottom. Place a mound of extra husks or a foil ball in the center of a steamer basket placed in a Dutch oven. Lean the tamales in the basket, open side up. Add water to Dutch oven just below the basket. Bring water to boil and reduce heat. Cover and steam 40 minutes, adding water when necessary. Serve with sour cream and salsa. Makes approximately 4 dozen small to medium sized tamales. To freeze these for future meals, leave them in the husks and place them in foil or freezer bags. To reheat, thaw and wrap in a wet paper towel and reheat in the microwave for 2 minutes for one or two or re-steam them just until hot. Red Chili Sauce15 large dried chilies (such as Anaheim, New Mexico, California, or pasilla) 4 -5 garlic cloves 2 teaspoons ground cumin 1 teaspoon salt 2 teaspoons all-purpose flour 2 teaspoons olive oil or 2 teaspoons melted shortening Directions: Remove stems and seeds from dried chili peppers. Place peppers in a single layer on a baking sheet. Roast in 350°F oven for 2 to 5 minutes or until you smell a sweet roasted aroma, checking often to avoid burning. Remove from oven and soak in enough hot water to cover for about 30 minutes or until cool. Put peppers and 2 1/2 cups of the soaking water into a blender (save the remaining soaking water). Add garlic, cumin and salt. Cover and blend until smooth. In a 2 quart sauce pan, stir flour into oil or melted shortening over med heat until browned. Carefully stir in blended chili mixture. Simmer uncovered for 5 to 10 minutes or until slightly thickened (if sauce gets too thick, stir in up to 1 cup of the remaining soaking water until you reach the desired thickness). Use this sauce for traditional tamales. Important note: When working with chilies, use rubber gloves to protect your skin, and avoid contact with your eyes. Wash hands thoroughly with soap and water to remove all of the chili oils. Written on 8 May 2013 at 11:53AM Comments Re: Hot Tamales If you can't find masa, let me know and I will gladly ship it to you John. Posted at 8 May 2013 at 12:56PM by Badger Re: Hot Tamales Definitely looks yummy, will have to see if I can find the ingredients.
Posted at 8 May 2013 at 12:13PM by superkaempe the gentle giant You must be logged in to post comments. Only the owner can comment this blog. Should Birds Be Kept As Pets? My answer to the question is YES! Birds should be kept as pets. Don't get me wrong, they should be protected in the wild as well, but birds do have a valid place in our lives and families as pets. It's a fact that a wild birds life spam is a fraction of what it is in captivity, they are also far less healthy, loose a far higher percentage of chicks and die from starvation & habitat destruction in contrast to pet bird owners going to extremes in search for the best foods and the most interesting toys for their birds and providing appropriate veterinary care. Many pet bird owners DO keep their birds fully flighted and their birds enjoy flying about their homes and outdoor aviaries. If someone is going to make the argument that birds were meant to fly free, then dogs and cats were meant to hunt and be free and no one should keep them either. It's hypocrisy to claim one without the other. The only valid argument is that there are a lot of unconscionable pet owners, to the tune of the same number of unconscionable parents, mates, and fellow workers. This sort of pet owner is also unconscionable in their treatment of cats and dogs, it's not just birds. Of my own, Icarus has had his wings clipped (not the first flight feathers either, rather just the secondary so he couldn't fly "high" into light fixtures and what not while he was learning). It wasn't for the long term, but rather the short term while he was learning to fly. Currently, Ick flies about the house, with the full freedom nature intended. He goes to bed in a cage, and come morning, knows the routine is to go to his "tree" with the other birds. Come nightfall, my bird family will clamor to be put away if I haven't already done so and all my birds are very happy with this set up. I don't doubt for a minute that they are happy, especially when they are riding on my shoulders or stealing food from my plate. The only time they don't all get out is if I have company (for the safety of my companies fingers remaining intact as like cats, not all my birds are friendly to strangers), or if I have to leave for a short spell. It is no surprise that the opinions of some are against keeping birds as pets. That is their belief. They are entitled to their opinion, but it is shameful that some attach to their opinion all sorts of manufactured factoids. It is shameful that they are attempting to color public opinion of those who have no familiarity with birds as pets. The facts are that there are millions of very well cared for happy pet birds in the USA, UK and throughout the world. In turn, as strongly as their thoughts are, they should also be against the keeping of any animal as pets because the argument used is about care and limitations of the animals physical being. Are we "bad" for keeping house cats? Indeed, my birds have the same limitations as any house cat. There's little difference between keeping chickens vs parrots, vs cats really. We coup chickens to keep them safe at night. Does that make us guilty for keeping them safe from predators? People with too small a coup are just as guilty as those keeping their dog in too small a crate, or putting it on a chain in the yard with a mere 12 foot radius. That doesn't mean nobody should ever be allowed to own a dog again. In my household, I don't own birds, rather, they own me and they know it. Also, due to the large number of birds living in captivity which cannot be returned to the wild and the limited space available in avian sanctuaries, optimizing care of birds held in private hands can go far in reducing suffering and improving the welfare of captive birds. Like people who adopt dogs and cats from the shelters, Mariah and Lucy are both birds I rescued and introduced to our happy family flock because I had available room and time to devote to them. There has been an ongoing animal rights agenda to eliminate all pet animals (kind of like the old tree huggers): dogs, cats, herps and birds, whether domesticated or non-domesticated. These anti-pet people follow a cult of sorts...the cult of NO ANIMAL USE. And, they consider pet animals as being "used." While they are legally free to have their opinion, it is important that the public recognize this end agenda so that the public is not suckered into agreeing with them and thus lose the right to keep pet animals of any kind. Many of us who do have pet birds and who do care about birds are also involved in conservation projects, either in funding projects or in actively participating in projects. Without our experience and intimate knowledge of the behavior of our birds, we would be less able to contribute meaningfully to this conservation work. Birds have been kept as pets as long as humans have lived in any type of family units or societies. Just because a modern day cult doesn't agree with the idea that birds be kept as pets doesn't mean their statements have any basis in fact. They take every opportunity to find reasons why their ideas should be supported by the public. If this kind of argument was supported, it would remove our ability to keep horses, cows, goats, pigs, dogs, cats, the list goes on....including our having children. We constrain our children with car seats, highchairs, playpens, naps, bed times and fences. Where do we draw the line? Either you are a good parent or you're not. Either you are a good pet caretaker, or you are not. It's all the same. I think people who care about birds in the wild or in captivity would be supportive of the statements of true scientists and conservation experts like Dr. Ulysses Seal of ISIS (http://eclectusbreeder.com/practices.htm ~ & ~ http://www2.isis.org/membership/Documents/Benefits%20of%20ISIS.pdf), who stated that IF we are going to maintain birds on the planet that we must have BOTH conservation of birds in the wild AND captive breeding of birds in domestic situations. There are bird species that have survived only because they were bred in captivity. Noted on the first link regarding Dr. Ulysses Seal, it states: Our philosophy about bird keeping and bird breeding is based on the fact that humans have been associated with birds from the earliest days and that these activities are not only traditional, but beneficial for birds and humans. I believe that by working with birds, learning about them, understanding them, and appreciating them, that our lives are enriched. For the birds, it means because of our interest and understanding of birds, we will do our best to see that they are protected, their habitats preserved and their future secured. We humans have more interest in protecting birds and animals with which we are familiar. Therefore, for most people who keep pet birds, and for the few who breed birds, they are more likely to take constructive action to conserve birds in the wild and to protect them in aviculture, than they would without this meaningful personal contact with birds.
Dr. Irene M. Pepperberg, author of Alex and Me: How a Scientist and a Parrot Discovered a Hidden World of Animal Intelligence — and Formed a Deep Bond in the Process (Harper Paperbacks, $13.99), says a large parrot needs an enriched environment to challenge its intelligence. “And we have to recognize that they may not be the perfect pet for everybody. It's a lifestyle issue,” she said. She says parrots are suitable pets for people who are home a lot. Writers and others who don't have to leave the house for work can interact with the birds all day long. “They make wonderful companions if you have the lifestyle,” Pepperberg said. “These are really intelligent creatures. I'm not trying to say they are terrible pets. I'm just trying to say be aware,” Pepperberg said. http://www.chron.com/disp/story.mpl/pets/6824863.html Written on 22 Aug 2012 at 1:57PM Comments Re: Should Birds Be Kept As Pets? I think you made the point that the welfare of a pet depends on the care provided by the owners and your birds are obviously happy and cared for. But it seems the squirrels are on a mission to release captive birds. So watch out... A rare bird has escaped from Edinburgh Zoo and is on the loose in the city after a squirrel chewed a hole at the top of its cage. http://www.bbc.co.uk/news/uk-scotland-edinburgh-east-fife-19346665 Posted at 23 Aug 2012 at 12:22AM by JimC Re: Should Birds Be Kept As Pets? Something I forgot to note in the above blog: Parrots fly as a way of finding food. For most bird species, this is a delicate energy balance: energy expending getting to the food -vs- energy obtained from food. Getting a large quantity of food back to a nest of fledglings is a rather unsafe and difficult process for bird parents as well. Humans tend to have this rather idealistic view that birds are flying around all day just for the heck of it: for most parrots, this would be suicide. Remember, parrots are birds of prey. Birds of prey are usually observed in flight when hunting: a bird of prey with a full stomach will sit until it is hungry again. Obviously, captive birds should be able to fly but it is common that pet birds given "freedom" from a cage for large parts of the day do not just fly around endlessly. Some parrots, Galahs for example, have evolved in harsh landscapes and therefore naturally spend many hours a day trying to find food and water and may fly great distances doing so: these birds tend to suffer greatly from being caged but largely because they are overfed. Parrot obesity is a greater problem than parrots being fed a poor diet despite wild claims otherwise. Remember - in the wild, parrots eat seeds, nuts, a few bugs, fruit and some vegetation. When bird owners feed parrots the same diet, they are considered neglectful by animal right agencies. It's a two faced claim. It's true however, that pelleted parrot food is healthier and more nutritious for your birds...but it's not what they eat in the wild. Years ago, I was fortunate to see Macaws in the wilds of Costa Rica. These birds roost in groups in selected trees and at dawn fly off to whichever tree is in fruit. They stay at the fruiting tree until dusk when they return to the roost. This seems little different than my birds playing and eating on the big bird gym during the day and returning to their cage at dust. Remaining in a large flight cage during the day on occasion isn't a bad thing either. A bird, well cared for in a well-designed and maintained cage, fed an appropriate diet and given stimulation is "better off" than it would be in a large, but essentially dull aviary being fed poorly. "Freedom" for a bird may mean freedom from predation, easy access to food, water and shelter and the opportunity to breed, socialize with their human flock and lead much longer lives in a far healthier state than they could in the wild. I believe there is a place for both. Posted at 22 Aug 2012 at 2:47PM by Badger You must be logged in to post comments. Only the owner can comment this blog. Florintines These Tuscan cookie treats (they are really more a candy than a cookie), are a true Christmas classic. They're deceptively simple to make, nutty flavored, perfectly chewy in the middle, crispy on the ends, toffee-scented with a hint of orange. If you aren’t salivating yet, try them with chocolate sandwiched between two layers, dipped with chocolate around the edges, drizzled with chocolate, sprinkled with powdered sugar or they can simply be rolled into flutes and accompany your coffee and teas.  FlorintinesIngredients 1 3/4 cups sliced, blanched almonds (about 5 ounces) 3 tablespoons all-purpose flour Finely grated zest of 1 orange (about 2 tablespoons) 1/4 teaspoon fine salt 3/4 cup sugar 2 tablespoons heavy cream 2 tablespoons light corn syrup 5 tablespoons unsalted butter 1/2 teaspoon pure vanilla extract Chocolate Topping, optional: 2 to 4 ounces semisweet chocolate, chopped Directions Note: It is important to follow the directions exactly. If the almond mixture is added at the wrong stage, the cookies will not spread out like they need to. Batter dropped onto a heated tray will start to spread the dough instantly so they end up oddly-shaped. So, if you are rolling them into cones, be sure to cool your tray with water each time you remove it from the oven or have extra trays handy. Position a rack in the center of the oven and preheat to 350 degrees F. Line a baking sheet with a silicone baking mat, wax or parchment paper (a well greased cookie sheet will do in a pinch). Pulse the almonds in a food processor until finely chopped, but not pasty. Stir together the nuts, flour, zest and salt in a large bowl. Put the sugar, cream, corn syrup and butter in a small saucepan. Cook over medium heat, stirring occasionally, until mixture comes to a rolling boil and sugar is completely dissolved. Continue to boil for 1 minute. Remove from heat and stir in the vanilla, then pour mixture into almond mixture and stir just to combine. Set aside until cool enough to handle, 30 minutes. Scoop rounded teaspoons (for 3-inch cookies) or rounded tablespoons (for 6-inch cookies) of batter and roll into balls. Place on prepared baking sheet, leaving about 3 to 4 inches between each cookie since they spread (they spread considerably!). Bake 1 pan at a time, until the cookies are thin and an even golden brown color throughout, rotating pans halfway through baking time, about 10 to 11 minutes. Cool on baking sheet for 5 minutes, then transfer to racks to cool. Repeat with remaining batter. Serve. Optional chocolate topping: Put the chocolate in a medium heatproof bowl. Bring a saucepan filled with 1 inch or so of water to a very low simmer; set the bowl over, but not touching, the water. Stir the chocolate occasionally until melted and smooth. (Alternatively, put the chocolate in a medium microwave-safe bowl. Melt at 50 percent power in the microwave until soft, about 1 minute. Stir, and continue heat until completely melted, about 1 to 2 minutes more.)
Store baked cookies carefully, separated by parchment or waxed paper, in an air-tight container for up to 3 days. Florentines are best stored separated from moist cookies and cakes. Variations: Replace the ground almonds with ground hazelnuts. Mix in 3 T very finely diced crystallized ginger 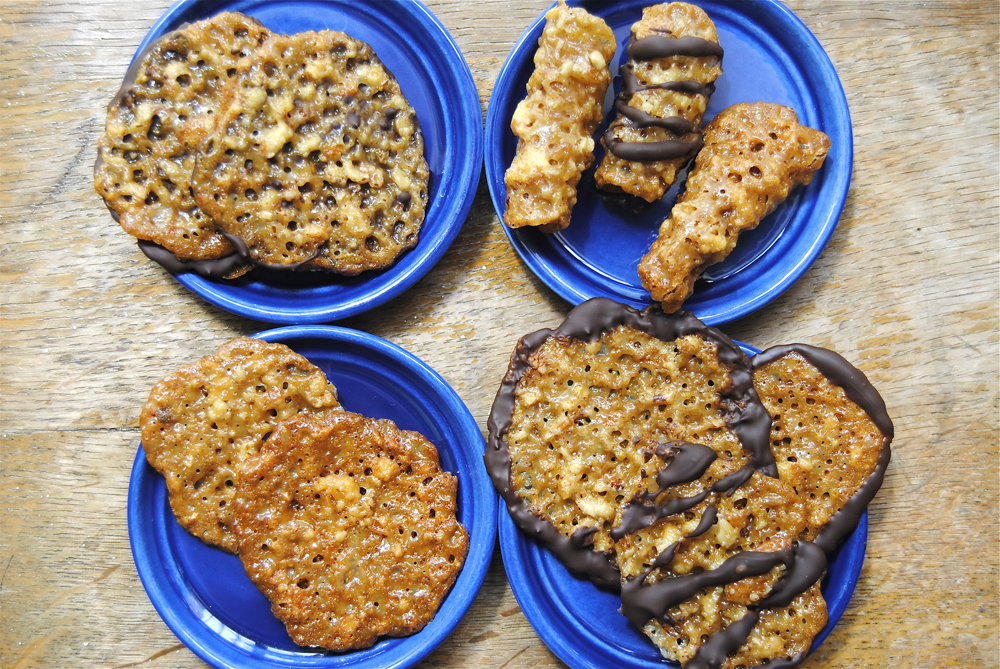
Written on 12 Apr 2012 at 12:45PM Comments Re: Florintines not good for my figure sorry lol
Posted at 3 May 2012 at 12:59PM by Budgie Re: Florintines Posted at 12 Apr 2012 at 4:41PM by Badger Re: Florintines Mary, if I drool any more, I'm going to have to replace my keyboard! These sound DELICIOUS!! Posted at 12 Apr 2012 at 12:56PM by Shimshin You must be logged in to post comments. Only the owner can comment this blog. Sopa de Frijoles Pollo This is one of those accidental dishes that came out of a "whats left in the cupboard" at the end of the month days. One large pot of soup, neighbors over for supper and it was gone in a heart beat. Frankly, the aroma of this cooking made us all so hungry, I was lucky to get pics! 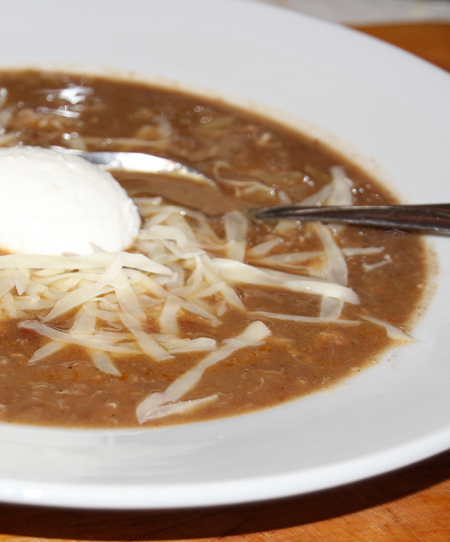 Sopa de Frijoles PolloIngredients 2 tablespoons olive oil 3 large chicken pieces (thighs, breasts, backs, what ever) 1 30 ounce can of traditional refried beans (I prefer Rosarita) 2 30 ounce cans of water 1/4 cup chili mix seasoning (Johnny's Lazy J Chili Mix is my favorite) 3/4 medium sized cabbage shredded & chopped (so you have small thin pieces) 1 large red onion chopped into large chunks 3 very full, but not heaping tablespoons ground cumin (a must have for any Mexican or chicken dish!) 3 very full, but not heaping tablespoons ground pepper (fresh is best, but pre-ground will do) 1 very full, but not heaping tablespoon kosher salt a couple dashes of your favorite hot sauce (careful to not overdo the hot sauce, regardless how tempting it may be - this is a spicy soup) Directions This soup is best cooked in a pressure cooker, so the beans don't burn on the bottom of your pan, but if you are happy to do a lot of stirring while cooking, you can make this meal in a large stock pot. If your pot is on the smaller side, use only one can of water instead of two. Mix the refried beans with the water in a large bowl until soupy. Starting with the oil, place all ingredients including your soupy beans in your pressure cooker, placing the chicken on top last. Cook on "stew" at the highest pressure for 60 minutes and release the pressure right away when finished. As soon as the pot is cool enough to open, gently pull out the chicken pieces with tongs or a fork, and shred the meat off the bones (toss the bones when finished). A close friend taught me the proper way for pulled pork or chicken is to use two forks (one in each hand) to shred the meat off the bones; it's quick, shreds the meat into the right size and is the least messy. Stir the shredded meat back into the soup and serve hot with crisp tortilla chips, shredded mozzarella and a dollop of sour cream. Serves 16 (it was so good that 8 of us finished it in one sitting, as we all kept going back for more, but we were truly being pigs lol) 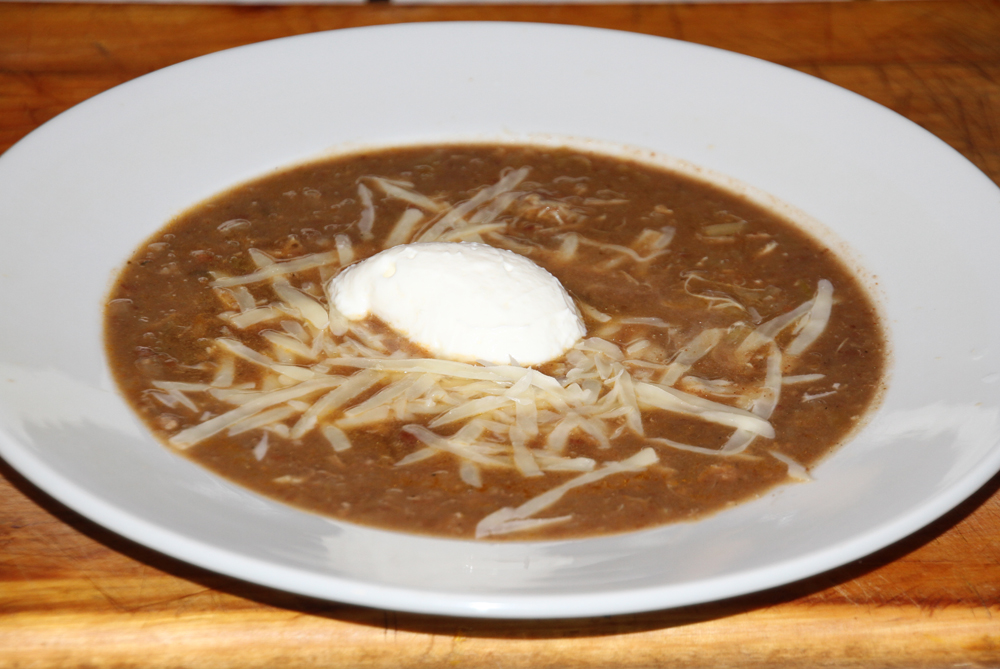
Written on 1 Apr 2012 at 2:37PM Comments Vanessa's Homemade Taco Shells I love Mexican food! Vanessa's corn tortillas are so much better than store bought too, and are very simple to make. Don't worry if some end up darker than others. That's just the nature of tacos! As for the taco filling, keep it rather simple and try wrapping the crisp taco in a soft flour tortilla for a special treat. A wonderful taco filling base: shredded beef or fish, 1/2 onion diced, diced green pepper, fresh diced tomatoes, one can of black beans, and tomato paste mixed with garlic powder, cumin (the world can never get enough cumin!), chili powder, salt and pepper to taste, cooked on high for 15 minutes, then simmered low for 45 minutes. Serve a layer in your taco shells, with home made salsa, diced avocado, sour cream and shredded cheese. 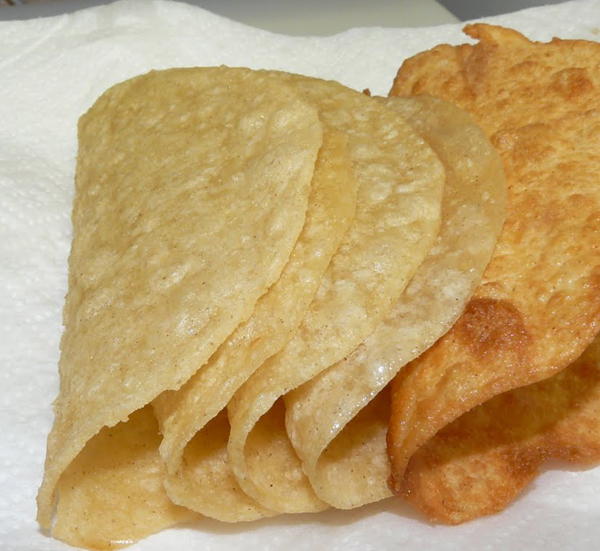 Vanessa's Homemade Taco ShellsIngredients:1 1/2 cup cold water 1 cup all purpose flour 1/2 cup of cornmeal 1/4 teaspoon salt 1 egg vegetable oil Directions:Heat well seasoned skillet over medium heat just until hot. Grease the skillet if it looks "dry". Beat water, flour, cornmeal, salt and egg with hand beater until smooth. Pour scant 1 quarter cup of the batter into skillet; immediately rotate skillet until batter forms very thin tortilla about 6 inches in diameter. Cook tortilla until dry around edge, about 2 minutes. Turn and cook other side unti golden, about 2 minutes longer. Heat oil (1 inch deep) in a 3 quart saucepan to 375. Slide tortilla into oil. Fold in half with tongs or two forks and hold so 1-inch space remains between halves of tortilla. Fry, turning occasionally, until crisp and golden brown; drain on paper towel. Do not use self rising flour in this recipe!!! If yours are chewy, it means the oil wasn't hot enough. 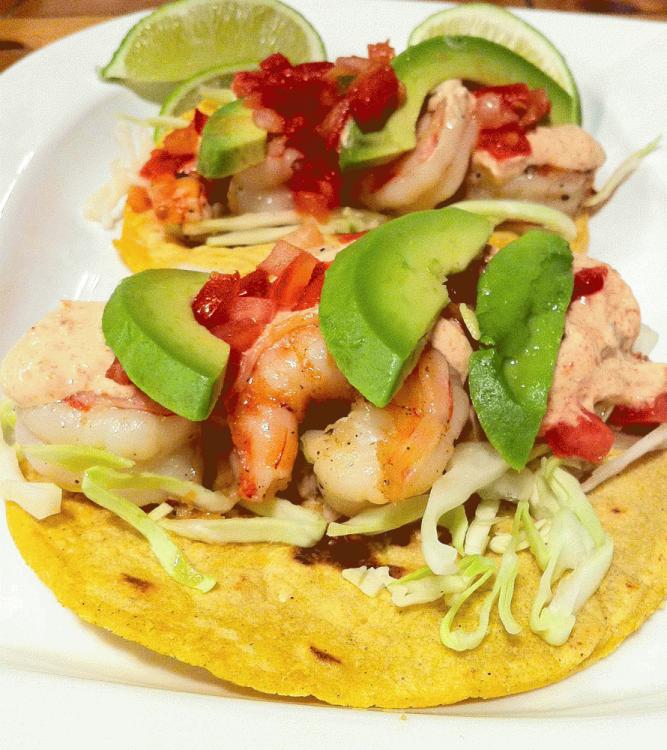 For the above shrimp taco, I made Mango salsa: Mango Salsa Ingredients:2 roma tomatoes seeded & diced 2 mangos, peeled & diced 1 small red pepper, cored, seeded & chopped coarsely 1 small red onion, diced ½ small Jicima peeled & diced ¼ c chopped fresh cilantro 1 med garlic, peeled & minced ½ jalapeño chili, seeded & minced (more if you want!!) 2 limes juiced ¼ c of mango or orange juice 1 tsp of your favorite hot sauce Directions:Mix all in a bowl then put in the refrigerator, covered, for 1-4 hours - then see if you can figure out why it keeps disappearing (like magic!). Written on 26 Mar 2012 at 6:39PM No comments have been posted yet. (You must be logged in to post comments) (Only the owner can comment this blog) Homemade Tortilla's Important - Do not substitute vegetable oil or shortening for the lard. Also, be sure to use exact amount of lard in this recipe. Using more than the two level tablespoons lard will cause the tortilla edges to break when being rolled out. 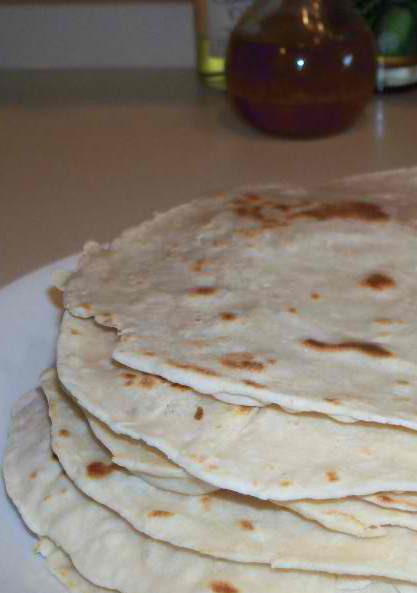 Ingredients:4 cups all-purpose flour 1 teaspoon salt 2 teaspoons baking powder 2 tablespoons lard 1 1/2 cups water Directions:Whisk the flour, salt, and baking powder together in a mixing bowl. Mix in the lard with your fingers until the flour resembles cornmeal. Add the water and mix until the dough comes together; place on a lightly floured surface and knead a few minutes until smooth and elastic. Divide the dough into 24 equal pieces and roll each piece into a ball. Preheat a large well seasoned skillet over medium-high heat. Use a well-floured rolling pin to roll a dough ball into a thin, round tortilla. Place into the hot skillet, and cook until bubbly and golden; flip and continue cooking until golden on the other side. Place the cooked tortilla in a tortilla warmer; continue rolling and cooking the remaining dough. Makes 24 nicely sized tortillas 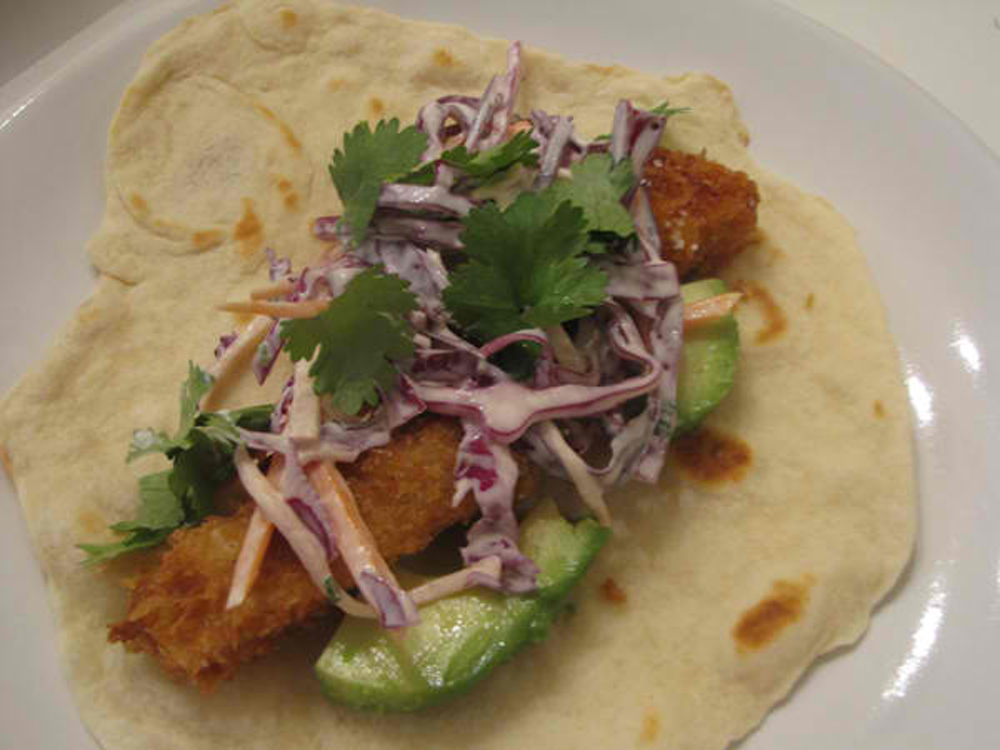
Written on 26 Mar 2012 at 6:24PM No comments have been posted yet. (You must be logged in to post comments) (Only the owner can comment this blog) Granola Bars Healthy and full of crisp, sweet, nutty flavor, these are my favorite treat to take hiking, camping, or just to keep around the house for breakfast or snacks. The nice thing about granola bars, is that they are so easy to modify! 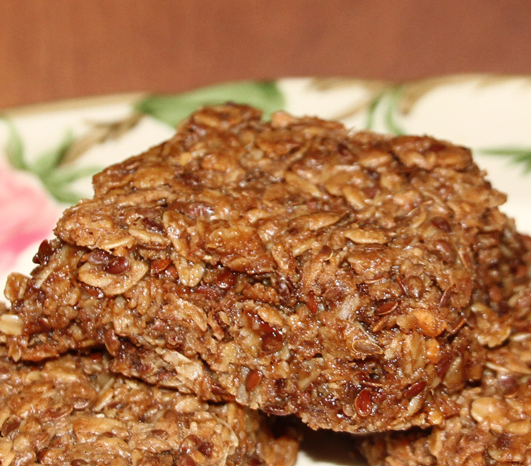 Granola BarsIngredients 10 cups rolled oats 1 3/4 cups wheat germ 1 3/4 cups oat bran 3/4 cup sesame seeds (optional) 3/4 cup unsweetened coconut flakes (optional) 1 cup shelled sunflower seeds 1 cup finely chopped almonds 1 1/2 cup finely chopped pecans 1 1/2 cup finely chopped walnuts Note: In place of the nuts above, you can also use two 10 oz cans of mixed nuts, finely chopped) 1 cup raisins (optional) 1 cup chocolate chips (optional) 1 cup flax seed/flax meal (optional) 1 1/2 teaspoons salt 1 1/2 cup brown sugar 1/2 cup cocoa powder (optional - but incredibly perfect for all chocolate lovers) 1 cup flavored syrup (maple, boysenberry etc) 1 cup honey 1 cup chocolate chips (optional) 1 1/2 cup butter or margerine 1 tablespoon ground cinnamon 1 tablespoon ground cloves 1 tablespoon vanilla extract 4 eggs Directions Preheat the oven to 325 degrees F. Lightly grease two large 11x21 baking sheets (or 4 9x11's). Combine the oats, wheat germ, oat bran, sunflower seeds, sesame seeds, coconut flakes, almonds, pecans, flax seed and walnuts in a large bowl. Whip the eggs together until lightly frothy and stir into the oat mixture just before adding the following syrup mixture. Syrup Mixture - Stir together the salt, brown sugar, syrup, honey, butter, cinnamon, cocoa powder and vanilla in a saucepan. Bring to a boil over medium heat, then pour over the dry ingredients, and stir to coat everything well. Spread the mixture out evenly on the baking sheets. Bake for 25 minutes for a softer crunch, 10 minutes more for a crispier crunch. When you remove from the oven, gently cut into bars but leave in the pan until completely cool. Store in an airtight container. 40 large 1 serving bars 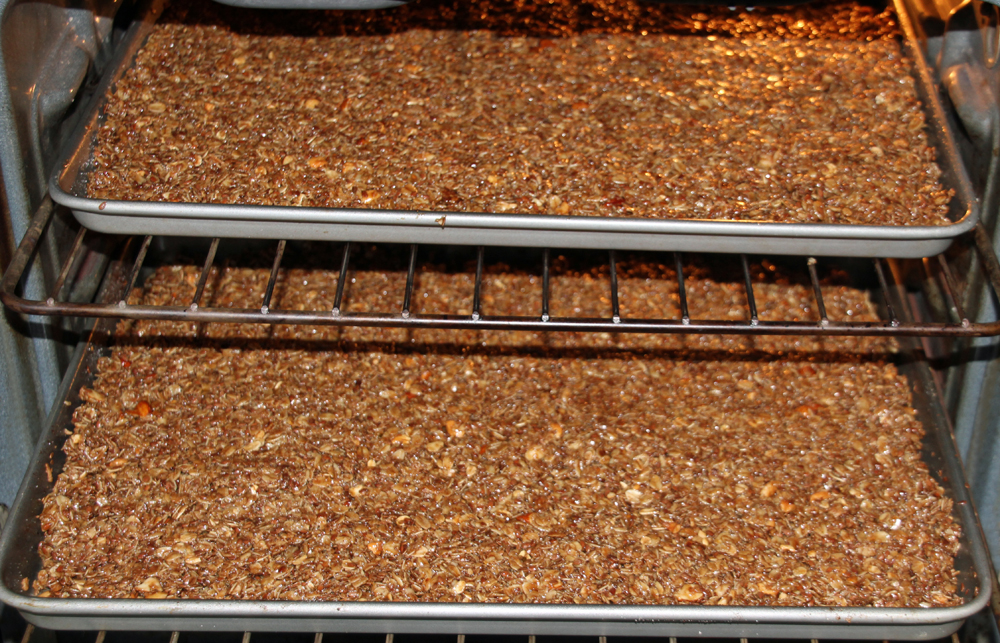 Please remind me that I really must stop baking! Especially if I expect to fit into a wedding dress in a couple months! |
| Almost Ice Cream |
| Variations |
{ Image: 2.bp.blogspot.com/_jnfrhbKW8zk/TBEf7NfeP2I/AAAAAAAAAjM/_k3HtIlTvQU/s1600/1.png }
| You are viewing entries number 1 - 10 | Display Older Entries |
©2000-2024 GoldToken.com LLC. All rights reserved. |